
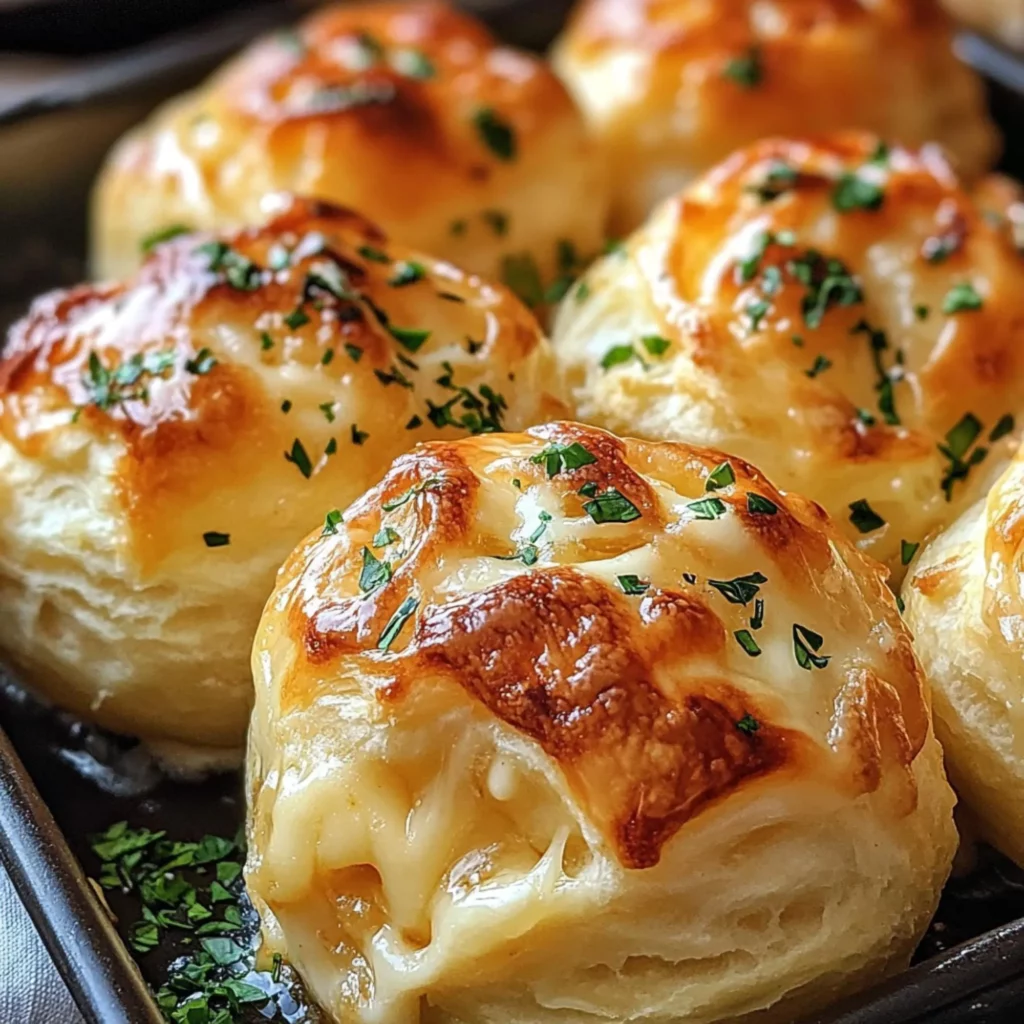
Imagine sinking your teeth into a warm, golden-brown biscuit that bursts with gooey melted cheese and is brushed generously with aromatic garlic butter. The combination of crispy edges, pillowy softness, and bold flavors makes Pillsbury Biscuit Garlic Butter Cheese Bombs an absolute crowd-pleaser. Whether you’re hosting game night, whipping up a quick snack, or looking for the perfect side dish, these little bites of heaven are guaranteed to steal the show.
The first time I made these cheese bombs, my kitchen transformed into a fragrant haven of roasted garlic and bubbling butter. As I pulled them out of the oven, their golden tops glistened under the light, and the smell alone had everyone hovering around the table before they were even plated.
What stood out most was how simple yet impactful this recipe felt—just a handful of ingredients came together to create something so indulgent and satisfying.
What sets these apart is their versatility. You can customize them endlessly—swap cheddar for mozzarella, add herbs like parsley or basil, or even toss in some pepperoni for a pizza-inspired twist. Pair them with marinara sauce, ranch dressing, or creamy spinach dip for extra flair.
Trust me; once you try these cheesy delights, you’ll find yourself craving them over and over again. So grab your Pillsbury biscuits, and let’s dive into making magic!
Overview of the Recipe
These Garlic Butter Cheese Bombs are inspired by classic comfort food but take only minutes to prepare using store-bought Pillsbury biscuit dough as the base. This clever shortcut allows home cooks to achieve bakery-quality results without all the fuss. While the origins of stuffed biscuits trace back to homemade drop biscuits filled with savory surprises, modern shortcuts like pre-made dough have turned this concept into a weeknight favorite.
Perfectly balanced between rich, cheesy goodness and herbaceous garlic notes, these bombs epitome simplicity meets decadence—a true win-win for busy cooks who crave flavor-packed meals.
Recipe Details
- Prep Time: 10 mins
- Cook Time: 15 mins
- Total Time: 25 mins
- Servings: 8-10 bombs
- Dietary Tags: Vegetarian
- Difficulty Level: Easy
Why You’ll Love This Recipe
There’s something undeniably magical about pulling hot, melty cheese bombs straight from the oven. Each bite offers a delightful contrast of textures—the crunchy exterior gives way to a fluffy interior packed with gooey, stringy cheese. And don’t get me started on the garlic butter glaze! It adds just the right amount of savory punch, elevating the entire experience.
These cheese bombs are not only incredibly delicious but also super easy to make, thanks to the convenience of ready-to-use biscuit dough.
Beyond taste, what makes this recipe truly special is its adaptability. Want to spice things up? Add jalapeños or red pepper flakes. Feeling adventurous? Try swapping the cheese for feta or goat cheese. They’re equally amazing served alongside soups, salads, or pasta dishes—or enjoyed solo as a guilty pleasure snack. Plus, kids absolutely adore them, making them a lifesaver for family dinners. With minimal prep time and maximum flavor payoff, these Pillsbury Biscuit Garlic Butter Cheese Bombs will quickly become a staple in your repertoire.
Ingredients List for Garlic Butter Cheese Bombs
- 1 can (7.5 oz) Pillsbury refrigerated biscuits
- 1 cup shredded cheddar cheese (or mozzarella for extra stretchiness )
- 4 tbsp unsalted butter, melted
- 1 tsp garlic powder
- 1 tsp dried parsley (optional )
- ½ tsp salt (adjust to taste )
- Optional: Crushed red pepper flakes or chopped fresh herbs for garnish
Step-by-Step for Making Garlic Butter Cheese Bombs
- Preheat the Oven : Preheat your oven to 400°F (200°C). Line a baking sheet with parchment paper or lightly grease it to prevent sticking.
Pro Tip: Use parchment paper for easy cleanup and perfectly golden bottoms. - Prepare the Biscuits : Open the can of Pillsbury biscuits and separate them into individual rounds. Flatten each biscuit slightly with your hands or a rolling pin to create a small disc.
Visual Cue: Aim for discs about 3-4 inches in diameter. - Add the Cheese : Place a generous tablespoon of shredded cheese in the center of each flattened biscuit. Fold the edges together, pinching tightly to seal the cheese inside. Roll the stuffed dough gently between your palms to form a smooth ball.
Pro Tip: Be sure to seal the edges well to prevent cheese from leaking during baking. - Assemble on the Baking Sheet : Arrange the cheese bombs on the prepared baking sheet, leaving about 1-2 inches of space between each bomb.
- Bake Until Golden Brown : Bake in the preheated oven for 12-15 minutes, or until the tops are golden brown and the dough is fully cooked through.
Visual Cue: The bombs should puff up slightly and have a glossy appearance. - Make the Garlic Butter Glaze : While the bombs bake, melt the butter in a small bowl. Stir in garlic powder, dried parsley, and salt. Once the bombs are out of the oven, brush them generously with the garlic butter mixture while they’re still warm.
Pro Tip: Brushing while warm ensures the butter soaks into the dough for maximum flavor. - Garnish and Serve : Sprinkle with additional parsley or red pepper flakes for extra flair if desired. Serve immediately while warm and gooey!
Serving Suggestions & Pairing Ideas
- Pairings : Serve these cheese bombs alongside marinara sauce, ranch dressing, or creamy spinach dip for dipping. They also pair beautifully with soups like tomato basil or roasted butternut squash.
- Garnish Tips : Top with freshly chopped parsley, grated Parmesan, or a light dusting of paprika for added color and flavor.
Storage and Reheating Tips
- Storage : Store leftover cheese bombs in an airtight container in the fridge for up to 3 days. For longer storage, freeze them in a single layer on a baking sheet before transferring to a freezer bag; they’ll keep for up to 1 month.
- Reheating : To reheat, place the bombs on a baking sheet and warm them in a 350°F (175°C) oven for 5-10 minutes until heated through. Avoid microwaving, as this can make the dough soggy.
Variations and Substitutions
- Cheese Options : Swap cheddar for mozzarella, pepper jack, or even brie for a gourmet twist.
- Add-Ins : Mix shredded chicken, diced ham, or sautéed mushrooms into the cheese filling for added protein and flavor.
- Dietary Adjustments : Use dairy-free cheese and vegan butter for a plant-based version. Gluten-free biscuit dough can also be substituted if available.

Nutritional Info
Per serving (1 cheese bomb):
- Calories: ~150
- Protein: 4g
- Carbs: 15g
- Fat: 8g
Disclaimer: Nutritional values are estimates and may vary based on specific ingredients used.
Conclusion
These Pillsbury Biscuit Garlic Butter Cheese Bombs are the ultimate comfort food—quick, easy, and utterly irresistible. Whether you’re hosting a party, feeding your family, or simply treating yourself, this recipe is guaranteed to impress. Don’t forget to rate the recipe and share your photos—I’d love to see your creations! Happy cooking!
FAQs
Q1: Can I use homemade biscuit dough instead of Pillsbury?
A: Absolutely! Homemade biscuit dough works just as well, though it will require a bit more prep time.
Q2: Can I make these ahead of time?
A: Yes! Assemble the cheese bombs, then refrigerate or freeze them before baking. When ready to serve, bake straight from cold, adding a few extra minutes to the cook time.
Q3: What’s the best way to prevent the cheese from leaking?
A: Seal the edges tightly by pinching firmly and rolling the dough into a smooth ball. This helps lock the cheese inside.
Q4: Can I add other seasonings to the garlic butter?
A: Definitely! Try adding Italian seasoning, smoked paprika, or chili flakes for a unique twist.
Q5: Are these suitable for kids?
A: Yes! Kids love the cheesy, buttery goodness of these bombs. You can omit the garlic if they’re picky eaters.
Q6: Can I freeze leftovers?
A: Yes! Freeze them in an airtight container or freezer bag. Reheat in the oven for best results.