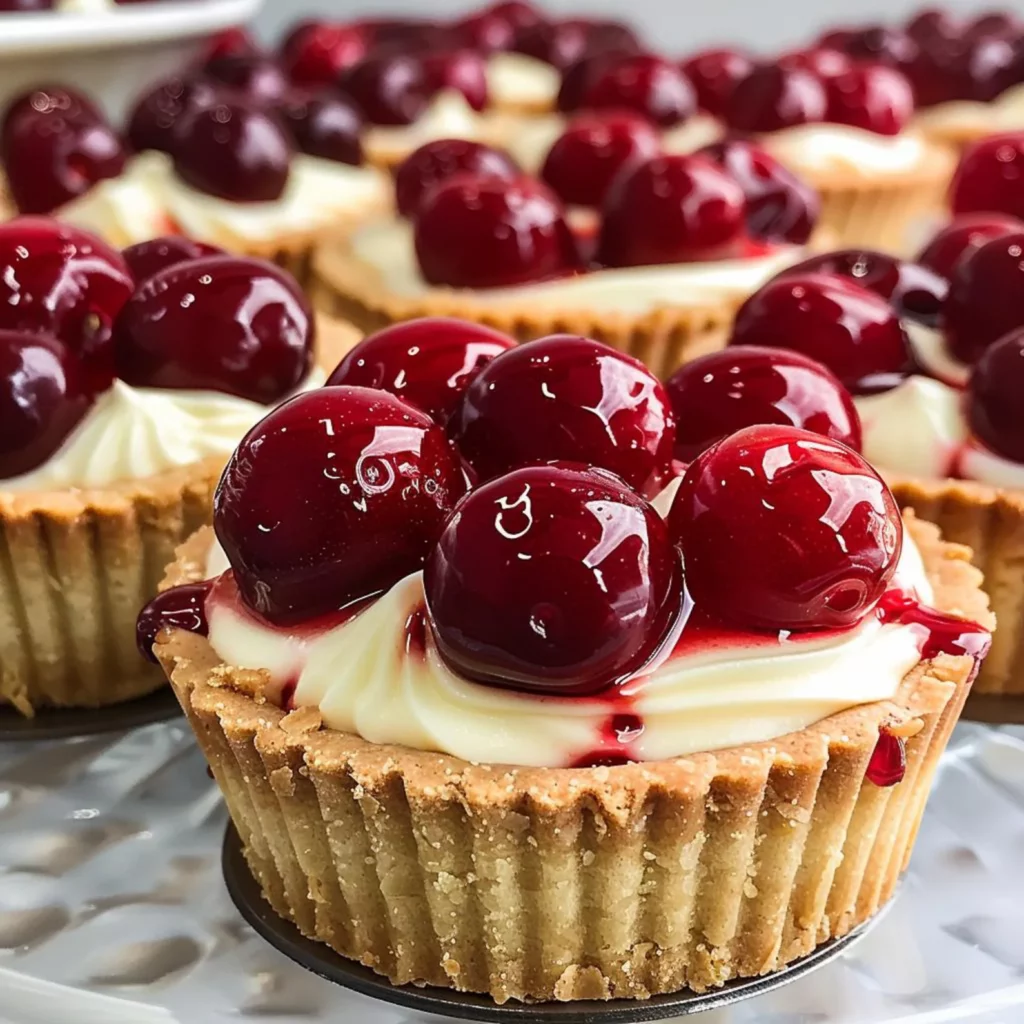
Have you ever wondered how to create a dessert that combines the creamy indulgence of cheesecake with the sweet-tart punch of cherries in a perfectly portioned treat? Many home bakers assume that impressive desserts require professional skills, but that’s simply not true with these delightful Cherry Cheesecake Tarts. These miniature delights deliver all the flavor of a traditional cheesecake but with added convenience and charm.
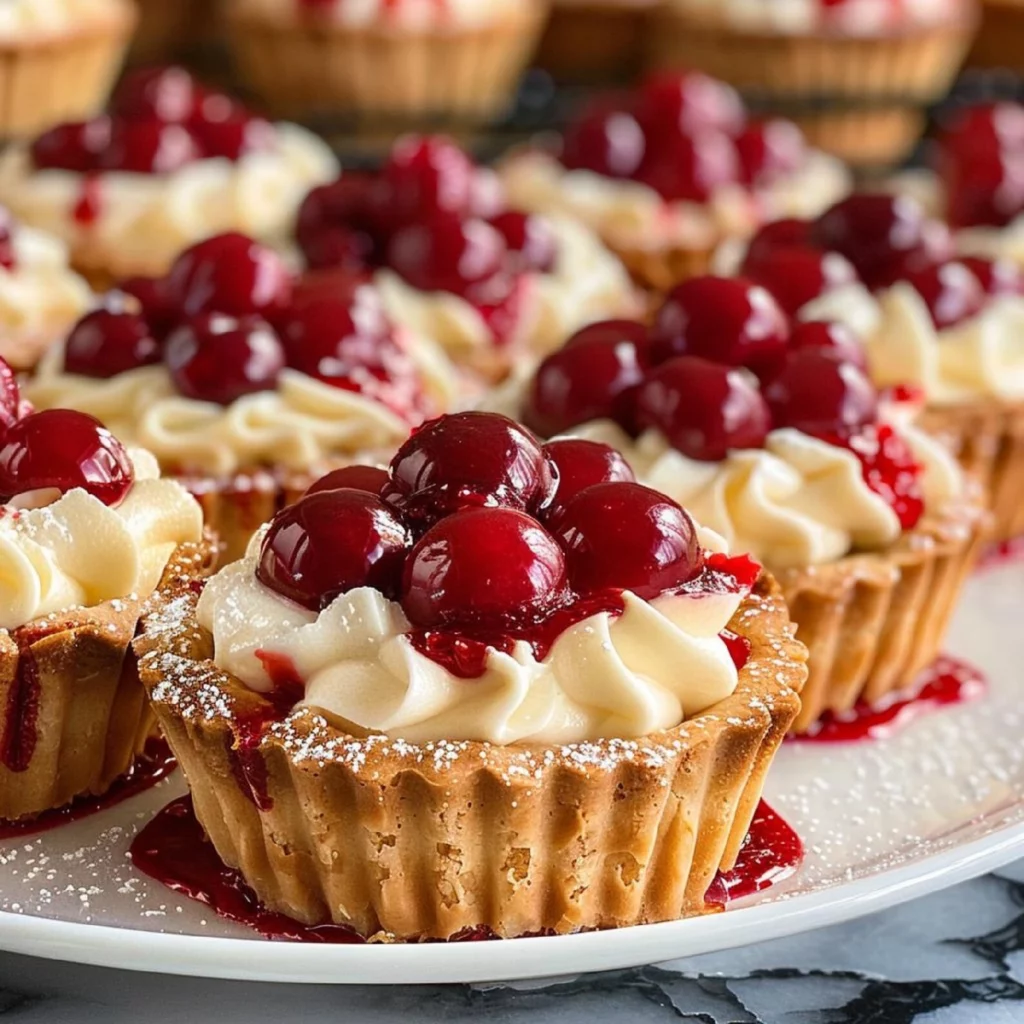
These Cherry Cheesecake Tarts feature buttery crusts filled with velvety cream cheese filling and topped with a vibrant cherry topping. They’re perfect for gatherings, holidays, or whenever you need a special sweet treat that’s sure to impress your family and friends.
Ingredients List
Gather these simple yet transformative ingredients to create these delectable Cheesecake Tarts with a cherry twist. Each component plays an essential role in creating the perfect balance of flavors and textures.
For the Crust:
- 1½ cups graham cracker crumbs (about 10 full sheet graham crackers)
- ¼ cup granulated sugar
- 6 tablespoons unsalted butter, melted
- Pinch of salt
For the Cheesecake Filling:
- 16 ounces cream cheese, softened (2 blocks)
- ½ cup granulated sugar
- 2 large eggs, room temperature
- 1 teaspoon vanilla extract
- 2 tablespoons all-purpose flour
- ¼ cup sour cream
- Zest of one lemon (optional for brightness)
For the Cherry Topping:
- 2 cups fresh or frozen cherries, pitted
- ⅓ cup granulated sugar
- 1 tablespoon lemon juice
- 2 tablespoons cornstarch mixed with 2 tablespoons water
- ½ teaspoon almond extract (optional but recommended)
Substitution options: Replace graham crackers with vanilla wafers or digestive biscuits for the crust. Greek yogurt can substitute for sour cream. For a lighter version, try reduced-fat cream cheese. Don’t have fresh cherries? Quality cherry preserves can work in a pinch.
Timing
- Preparation Time: 30 minutes for assembling ingredients and preparing the tart crusts and filling
- Baking Time: 25-30 minutes for the tarts to bake properly
- Cooling/Setting Time: At least 3 hours, preferably overnight for the best texture and flavor development
- Total Time: Approximately 4 hours (including minimum cooling time), which is about 25% less time than making a traditional full-sized cheesecake that typically requires 5+ hours from start to finish.
Step-by-Step Instructions
Step 1: Prepare the Crust
Preheat your oven to 325°F (165°C). In a medium bowl, combine graham cracker crumbs, sugar, and salt. Pour in melted butter and mix until the mixture resembles wet sand. The perfect consistency should hold together when pressed between your fingers without being overly greasy.
Step 2: Form the Tart Shells
Line a 12-cup muffin tin with paper liners or use a specialized tart pan. Press approximately 2 tablespoons of the graham cracker mixture into each cup, using the bottom of a small glass or measuring cup to compact it firmly. Create an even layer with a slight rim up the sides.
Step 3: Pre-bake the Crusts
Bake the empty crusts for 5 minutes, then remove from the oven and allow to cool slightly while preparing the filling. This pre-baking step ensures your crusts will remain crisp and won’t become soggy once filled.
Step 4: Create the Cheesecake Filling
In a large bowl, beat the softened cream cheese and sugar until smooth and fluffy, about 2 minutes. Add eggs one at a time, beating well after each addition. Mix in vanilla extract, flour, sour cream, and lemon zest (if using). Beat until just combined, being careful not to overmix which can introduce too much air.
Step 5: Fill and Bake the Tarts
Spoon or pipe the cheesecake filling into each pre-baked crust, filling about ¾ full. Tap the pan gently on the counter to release any air bubbles. Bake at 325°F for 20-25 minutes, until the centers are almost set but still slightly jiggly.
Step 6: Prepare the Cherry Topping
While the tarts are baking, combine cherries, sugar, and lemon juice in a saucepan over medium heat. Bring to a simmer and cook for 5 minutes until cherries soften and release their juices. Stir in the cornstarch slurry and continue cooking for 2-3 minutes until the mixture thickens. Remove from heat and stir in almond extract if using.
Step 7: Cool and Top the Tarts
Allow the baked tarts to cool completely at room temperature, then refrigerate for at least 2 hours. Once chilled, top each tart with a generous spoonful of the cherry topping. For the best flavor development, refrigerate for another hour before serving.
Nutritional Information
Each Cherry Cheesecake Tart (based on a yield of 12 tarts) contains approximately:
- Calories: 320 kcal
- Total Fat: 21g (Saturated Fat: 12g)
- Cholesterol: 85mg
- Sodium: 220mg
- Total Carbohydrates: 30g (Dietary Fiber: 1g, Sugars: 22g)
- Protein: 5g
- Calcium: 6% of daily recommended intake
- Iron: 4% of daily recommended intake
These tarts contain approximately 30% fewer calories than a standard slice of cherry cheesecake, making them a more portion-controlled option for dessert lovers who are mindful of their intake.
Healthier Alternatives for the Recipe
Transform these delicious tarts into a more nutritious treat with these smart modifications:
- Substitute 1/3 of the cream cheese with Greek yogurt to reduce fat content while maintaining creaminess
- Use almond flour and coconut oil for a grain-free crust option that adds healthy fats
- Replace refined sugar with coconut sugar or honey (use ¾ the amount) for a less processed sweetener
- Add chia seeds to the cherry topping for extra fiber and omega-3 fatty acids
- For a dairy-free version, use dairy-free cream cheese and coconut cream in place of sour cream
For those following specific diets, consider using a nut-based crust for keto-friendly options or swap in gluten-free graham crackers for those with gluten sensitivities.
Serving Suggestions
Elevate your Cherry Cheesecake Tarts with these creative serving ideas:
- Dust with a light sprinkle of powdered sugar just before serving for an elegant touch
- Add a small sprig of fresh mint for color contrast and a refreshing aroma
- Serve alongside a scoop of vanilla bean ice cream for a decadent dessert experience
- Create a dessert charcuterie board with these tarts as the centerpiece, surrounded by chocolate-dipped strawberries and shortbread cookies
- For brunch gatherings, pair with mimosas or a coffee service for a sophisticated sweet option
For special occasions, consider creating a tart tower by arranging them on a tiered stand, creating an impressive visual centerpiece that’s sure to wow your guests.
Common Mistakes to Avoid
- Overmixing the filling: This introduces too much air and can cause cracks. Mix just until ingredients are combined.
- Using cold ingredients: Room temperature cream cheese and eggs blend more smoothly. Cold ingredients lead to lumpy filling.
- Overbaking: Tarts should still have a slight jiggle in the center when removed from the oven. They’ll continue cooking from residual heat.
- Rushing the cooling process: Patience is key! Proper cooling prevents condensation and soggy crusts.
- Adding topping too soon: Wait until tarts are completely chilled before adding the cherry topping to prevent it from sinking in.
Storing Tips for the Recipe
Maximize freshness and convenience with these storage recommendations:
Refrigeration: Store assembled tarts in an airtight container in the refrigerator for up to 4 days. Place parchment paper between layers if stacking to prevent sticking.
Freezing: These tarts freeze beautifully! Freeze them without the cherry topping on a baking sheet until solid, then transfer to a freezer-safe container. They’ll keep for up to 2 months. Thaw overnight in the refrigerator and add fresh topping before serving.
Make-ahead options: Prepare components separately up to 2 days in advance. Store the crust mixture, unbaked, in the refrigerator. The cherry topping can be made and refrigerated separately. Assemble just before serving for the freshest results.
Conclusion
These delightful Cherry Cheesecake Tarts offer the perfect balance of creamy cheesecake filling, buttery graham cracker crust, and sweet-tart cherry topping in an irresistible individual portion. They’re easier to make than a traditional cheesecake yet deliver all the flavor and elegance you crave in a dessert.
Have you tried making these tarts? We’d love to see your creations! Share your photos and experience in the comments below, or tag us on social media. If you enjoyed this recipe, don’t forget to check out our other dessert recipes for more sweet inspiration. Happy baking!