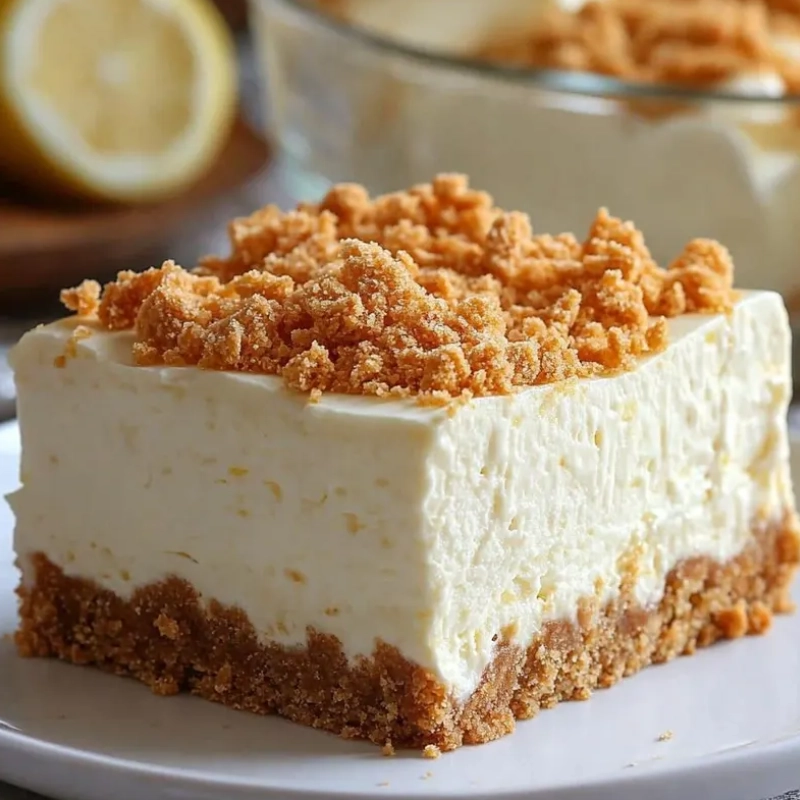
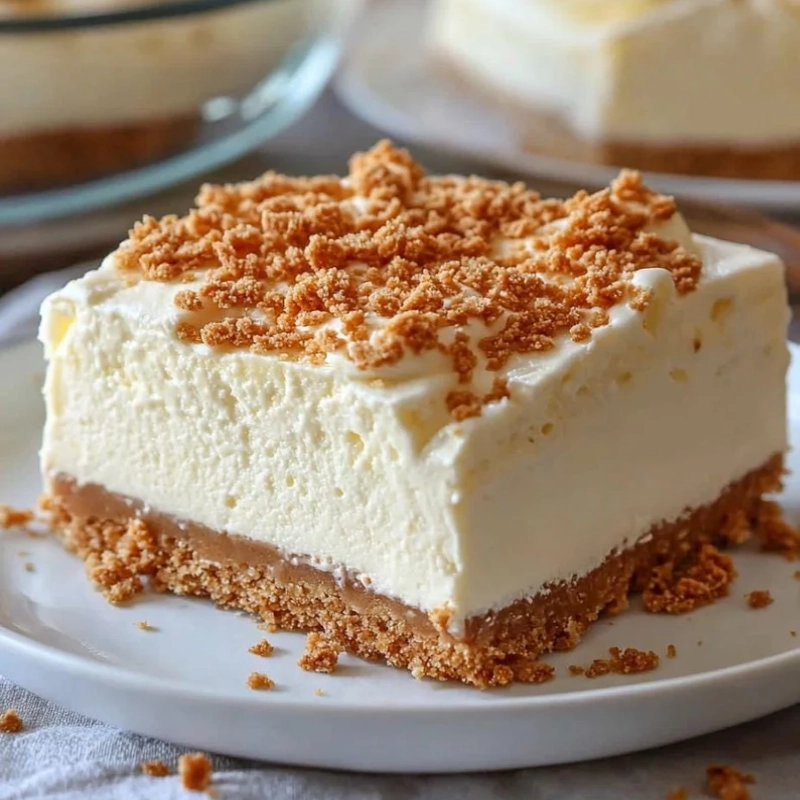
Have you ever tasted a dessert so creamy and nostalgic that it instantly transports you back to simpler times? The legendary No Bake Classic Woolworth Cheesecake does exactly that, capturing the essence of the iconic department store’s beloved luncheonette treat that had customers lining up for more.
This refreshing, light-as-air cheesecake doesn’t require any baking, making it perfect for warm summer days or when you need a quick dessert that still impresses. The woolworth cheesecake recipe has stood the test of time for good reason – it’s simple yet unforgettable.
I’ve perfected this vintage recipe through countless trials, ensuring you get that authentic taste that made the original so famous. Let’s dive into creating this retro dessert that combines the perfect graham cracker crust with a lemon-kissed, cloud-like filling.
Ingredients List
For the Crust:
- 2 cups graham cracker crumbs (about 16 full sheets, finely crushed)
- 1/2 cup unsalted butter, melted
- 1/4 cup granulated sugar
- 1/4 teaspoon salt
For the Filling:
- 1 package (8 oz) cream cheese, softened to room temperature
- 1 cup granulated sugar
- 2 envelopes (2 tablespoons total) unflavored gelatin
- 1/2 cup cold water
- 1/2 cup boiling water
- 1/4 cup fresh lemon juice
- 1 tablespoon lemon zest
- 1 teaspoon vanilla extract
- 1 can (12 oz) evaporated milk, chilled overnight
Substitution options: For a lighter version, use reduced-fat cream cheese. Can’t find evaporated milk? Heavy whipping cream works well too. For gluten-free needs, substitute graham crackers with gluten-free cookies or a nut-based crust.
Timing
- Preparation time: 30 minutes
- Chilling time: Minimum 4 hours (preferably overnight)
- Total time: 4.5 hours (including minimum chilling time)
This No Bake Classic Woolworth Cheesecake requires just 30 minutes of active preparation time – 40% less than traditional baked cheesecakes that typically need 50 minutes of prep plus baking time. The hands-off chilling period makes this perfect for planning ahead.
Step-by-Step Instructions
Step 1: Prepare the Crust
In a medium bowl, combine graham cracker crumbs, melted butter, sugar, and salt. Mix until the texture resembles wet sand and the mixture holds together when pressed. The butter should be completely distributed with no dry spots remaining.
Press the mixture firmly into the bottom and slightly up the sides of a 9-inch springform pan or deep pie dish. Use the bottom of a measuring cup to compact the crust evenly. Place in the refrigerator to firm up while preparing the filling.
Step 2: Dissolve the Gelatin
Pour 1/2 cup cold water into a small bowl and sprinkle the unflavored gelatin evenly over the surface. Let it stand for 2 minutes to bloom (it will look wrinkled on the surface). Add 1/2 cup boiling water and stir continuously until the gelatin completely dissolves and the solution is clear.
Set aside to cool slightly but not set. The gelatin mixture should remain liquid but not hot when added to other ingredients. This typically takes about 5-10 minutes at room temperature.
Step 3: Prepare the Cream Cheese Base
In a large mixing bowl, beat the softened cream cheese until completely smooth and free of lumps. Add the sugar gradually while continuing to beat. The mixture should become light and fluffy with a silky texture.
Slowly add the cooled gelatin mixture, lemon juice, lemon zest, and vanilla extract. Beat until thoroughly combined and smooth. The lemon adds that signature tangy brightness that made the original Woolworth version so memorable.
Step 4: Whip the Evaporated Milk
In a separate chilled bowl, beat the cold evaporated milk until it doubles in volume and soft peaks form, about 5-7 minutes. This is the secret to the Woolworth’s light texture – properly whipped evaporated milk creates an airy, mousse-like consistency.
For best results, chill your beaters and bowl in the freezer for 15 minutes before whipping. The colder everything is, the better your milk will whip up.
Step 5: Combine and Chill
Gently fold the whipped evaporated milk into the cream cheese mixture using a rubber spatula. Use a light hand and a figure-eight motion to maintain as much air as possible in the mixture. The filling should be light, fluffy, and uniform in color.
Pour the filling over the prepared crust and smooth the top with a spatula. Refrigerate for at least 4 hours, but preferably overnight, until completely set. The No Bake Classic Woolworth Cheesecake will firm up beautifully while maintaining its cloud-like texture.
Nutritional Information
Per serving (1/12 of cheesecake):
- Calories: 325
- Total Fat: 18g
- Saturated Fat: 10g
- Cholesterol: 52mg
- Sodium: 230mg
- Total Carbohydrates: 36g
- Dietary Fiber: 0.5g
- Sugars: 29g
- Protein: 5g
This classic dessert contains approximately 40% fewer calories than traditional baked cheesecakes, which typically range from 500-600 calories per slice. The absence of eggs also makes it lower in cholesterol than conventional cheesecake recipes.
Healthier Alternatives for the Recipe
For a lighter version, substitute Neufchâtel cheese (1/3 less fat) for regular cream cheese and use a sugar alternative like monk fruit sweetener or erythritol to reduce calories by up to 25%.
Create a dairy-free adaptation by using dairy-free cream cheese and coconut cream instead of evaporated milk. For those watching carbs, replace the graham cracker crust with an almond flour and butter mixture.
Boost the nutritional profile by adding fresh berries to the filling or as a topping. Berries add antioxidants, fiber, and natural sweetness while reducing the need for added sugar.
Serving Suggestions
Serve this No Bake Classic Woolworth Cheesecake chilled with a dollop of freshly whipped cream and a sprinkle of additional lemon zest for an elegant presentation that enhances the citrus notes.
Create a retro dessert bar by offering various toppings like fresh berries, crushed pineapple, cherry pie filling, or chocolate sauce, allowing guests to customize their slice just as they might have at the Woolworth counter.
For a special occasion, serve with a side of lemon curd or berry compote. The contrast between the cool, creamy cheesecake and slightly warm fruit sauce creates a delightful temperature and flavor contrast.
Common Mistakes to Avoid
- Room temperature cream cheese is essential – Cold cream cheese will result in lumps that never fully incorporate, no matter how long you beat the mixture.
- Don’t rush the chilling process – The gelatin needs sufficient time to set properly. Cutting this time short will result in a runny cheesecake that falls apart when sliced.
- Avoid over-beating the evaporated milk – If whipped too long, it can become grainy or buttery. Stop when you reach soft peaks.
- Don’t substitute regular milk for evaporated milk – Regular milk won’t whip properly. This ingredient is crucial for the signature texture.
- Be gentle when folding – Rough mixing will deflate the air in your whipped evaporated milk, resulting in a dense rather than fluffy texture.
Storing Tips for the Recipe
Cover the cheesecake tightly with plastic wrap or store in an airtight container in the refrigerator for up to 5 days. The flavor actually improves after the first 24 hours as the lemon notes mellow and blend with the creamy base.
This cheesecake freezes beautifully for up to 3 months. Wrap individual slices or the entire cake (without toppings) in plastic wrap, then aluminum foil. Thaw overnight in the refrigerator before serving.
For make-ahead convenience, prepare the crust up to 2 days in advance and keep refrigerated. The filling can be made up to 24 hours ahead and stored separately, then assembled when needed.
Conclusion
This No Bake Classic Woolworth Cheesecake recipe revives a beloved American classic that combines simplicity with spectacular results. The airy texture, hint of lemon, and perfect graham cracker crust create a dessert that’s simultaneously nostalgic and timeless.
Have you tried recreating this iconic department store treat? I’d love to hear about your experience in the comments below! Share your photos, variations, or memories of enjoying the original at Woolworth’s lunch counter. And don’t forget to check out our other vintage-inspired desserts that bring back the flavors of yesteryear!