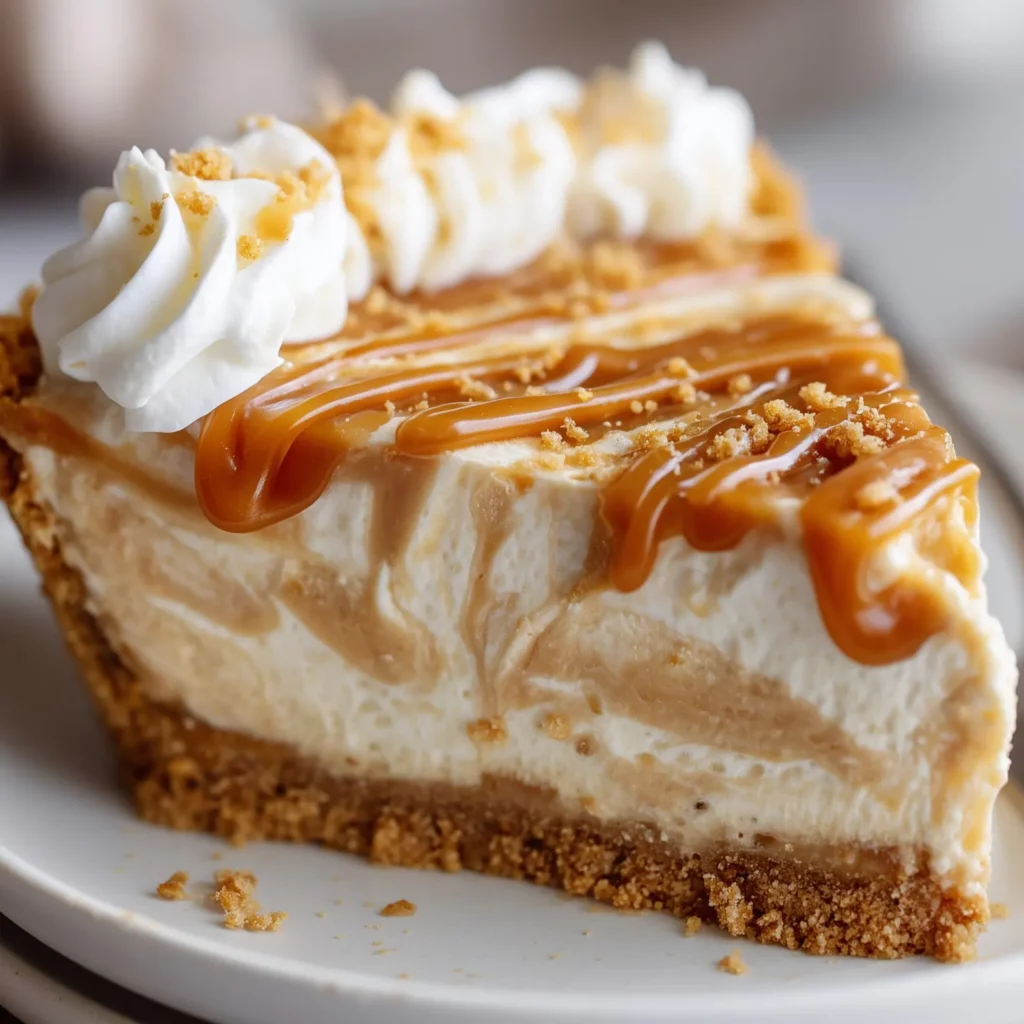
Have you ever craved a decadent dessert that combines the rich caramel notes of dulce de leche with the velvety texture of cheesecake—all without turning on your oven? The perfect balance of sweet and tangy flavors wrapped in a buttery graham cracker crust might seem like a bakery-only treat, but what if I told you it’s achievable right in your kitchen?
This No Bake Dulce de Leche Cheesecake recipe delivers all the indulgence of a traditional cheesecake with half the effort. The silky-smooth filling, infused with caramelized sweetened condensed milk, creates an unforgettable dessert that will have everyone asking for seconds.
Ingredients List
For the Crust:
- 2 cups graham cracker crumbs (about 16 full sheets)
- 1/2 cup (1 stick) unsalted butter, melted
- 1/4 cup granulated sugar
- 1/4 teaspoon salt
For the Filling:
- 24 oz (3 packages) cream cheese, softened at room temperature
- 1 cup dulce de leche (store-bought or homemade)
- 1/2 cup granulated sugar
- 1 tablespoon vanilla extract
- 1/4 teaspoon salt
- 1 cup heavy whipping cream, whipped to stiff peaks
For the Topping:
- 1/2 cup dulce de leche, slightly warmed for drizzling
- 1/4 cup chopped pecans or walnuts (optional)
- 1/2 teaspoon flaky sea salt (optional, for sweet-salty contrast)
Substitution options: Use chocolate graham crackers or digestive biscuits for the crust. Low-fat cream cheese can replace full-fat, though the texture will be slightly less rich. Greek yogurt can substitute for some of the heavy cream if desired.
Timing
- Preparation time: 30 minutes
- Chilling time: Minimum 6 hours, preferably overnight
- Total time: 6.5+ hours (including chilling)
While this No Bake Dulce de Leche Cheesecake requires patience for proper setting, the active prep time is 70% less than traditional baked cheesecakes. Most of the time is hands-off refrigeration, allowing you to prepare this dessert well in advance of serving.
Step-by-Step Instructions
Step 1: Prepare the Crust
In a medium bowl, combine graham cracker crumbs, melted butter, sugar, and salt. Mix until the mixture resembles wet sand and holds together when pressed between your fingers. The perfect consistency should be moist enough to compact but not soggy.
Press the mixture firmly into the bottom and slightly up the sides of a 9-inch springform pan. Use the flat bottom of a measuring cup to create an even, compact layer. This ensures your crust won’t crumble when slicing.
Place the crust in the refrigerator to firm up while preparing the filling. This quick chilling helps the crust maintain its structure when you add the creamy filling.
Step 2: Create the Filling
In a large mixing bowl, beat the softened cream cheese until smooth and fluffy, about 2-3 minutes. Scrape down the sides of the bowl frequently to ensure no lumps remain. Room temperature cream cheese is essential for a silky-smooth texture.
Add the dulce de leche, sugar, vanilla extract, and salt to the cream cheese. Beat on medium speed until completely incorporated and the mixture looks uniform, approximately 2 minutes. The caramel color should be evenly distributed throughout.
Gently fold in the whipped cream using a rubber spatula. Use a light hand and fold just until combined—overmixing will deflate the air in the whipped cream that helps give the cheesecake its light texture.
Step 3: Assemble and Chill
Remove the crust from the refrigerator and pour the filling into the prepared crust. Use an offset spatula to smooth the top into an even layer. Tap the pan gently on the counter a few times to release any air bubbles trapped in the filling.
Cover the cheesecake with plastic wrap, being careful not to let it touch the surface of the filling. Refrigerate for at least 6 hours, but preferably overnight. Patience is key—proper chilling ensures the perfect sliceable consistency.
Step 4: Add the Finishing Touches
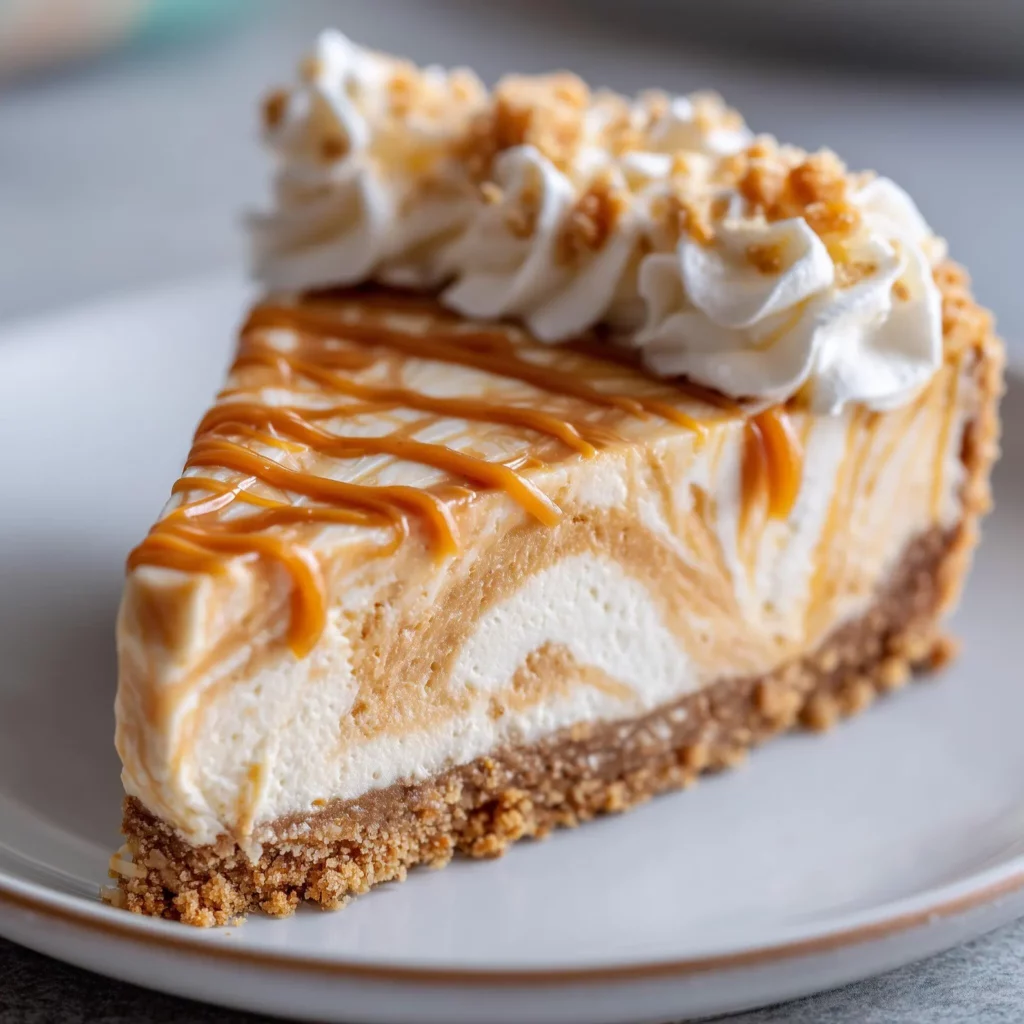
When ready to serve, remove the cheesecake from the refrigerator and carefully release the springform pan. Transfer to a serving plate. For the cleanest slices, dip your knife in hot water and wipe dry between cuts.
Warm the remaining 1/2 cup of dulce de leche slightly in the microwave (10-15 seconds) or in a small saucepan over low heat until it reaches a pourable consistency. Drizzle over the top of the cheesecake in a decorative pattern.
If desired, sprinkle with chopped nuts and a light dusting of flaky sea salt to enhance the caramel flavor. The salt creates a sophisticated sweet-salty contrast that elevates this No Bake Dulce de Leche Cheesecake to restaurant quality.
Nutritional Information
Per serving (1/12 of cheesecake):
- Calories: 425
- Total Fat: 30g
- Saturated Fat: 18g
- Cholesterol: 95mg
- Sodium: 320mg
- Total Carbohydrates: 35g
- Dietary Fiber: 0.5g
- Sugars: 28g
- Protein: 6g
This dessert is undeniably indulgent, with the dulce de leche contributing approximately 40% of the total sugar content. When enjoyed as an occasional treat, it provides small amounts of calcium (15% of daily value) and vitamin A (12% of daily value) per serving.
Healthier Alternatives for the Recipe
For a lighter version, substitute one-third of the cream cheese with Greek yogurt cream cheese, reducing the calorie count by approximately 15% while maintaining the creamy texture. Neufchâtel cheese (⅓ less fat than regular cream cheese) also works well as a direct substitute.
Consider a nut-based crust using 1½ cups of ground almonds or walnuts mixed with 3 tablespoons of melted coconut oil and 2 tablespoons of honey. This grain-free alternative adds healthy fats and reduces refined carbohydrates.
For a lower-sugar option, replace half the granulated sugar with a natural sweetener like monk fruit or stevia (adjust quantities according to package directions). You can also find reduced-sugar dulce de leche or make your own using sweetened condensed milk with less sugar.
Serving Suggestions
For an elegant presentation, serve thin slices on chilled plates with a small dollop of lightly sweetened whipped cream and a fresh raspberry or two. The tartness of the berries beautifully balances the caramel sweetness.
Create a dessert bar by offering small slices alongside bowls of toppings like chocolate shavings, toasted coconut flakes, crushed toffee bits, and various fruit compotes. This interactive approach is perfect for gatherings.
For coffee lovers, pair a slice with a shot of espresso or a small cup of strong coffee. The bitter notes of the coffee complement the sweet caramel flavors of the cheesecake, creating a balanced flavor experience reminiscent of Latin American dessert traditions.
Common Mistakes to Avoid
- Using cold cream cheese: Always bring cream cheese to room temperature (about 1 hour on the counter) to prevent lumps in your filling. Cold cream cheese won’t blend properly, resulting in a grainy texture.
- Overmixing the filling: Once you add the whipped cream, fold gently just until incorporated. Overmixing will deflate the mixture and result in a dense rather than light and airy cheesecake.
- Rushing the chilling process: The minimum 6-hour chilling time is non-negotiable. Cutting this short will result in a soft, potentially runny cheesecake that won’t hold its shape when sliced.
- Using warm dulce de leche in the filling: Ensure your dulce de leche is at room temperature before adding it to the cream cheese mixture. Warm dulce de leche can melt the fat in the cream cheese, preventing proper setting.
Storing Tips for the Recipe
This No Bake Dulce de Leche Cheesecake can be refrigerated for up to 5 days. Store it covered with plastic wrap or in an airtight container to prevent it from absorbing other flavors from the refrigerator.
For longer storage, this cheesecake freezes beautifully for up to 2 months. Freeze the whole cheesecake or individual slices on a baking sheet until solid, then wrap tightly in plastic wrap followed by aluminum foil or place in freezer-safe containers.
To thaw, transfer frozen cheesecake to the refrigerator and allow 8 hours for a whole cheesecake or 2-3 hours for individual slices. Add the dulce de leche drizzle and toppings after thawing for the freshest presentation.
Conclusion
This creamy, caramel-infused no-bake cheesecake offers all the decadence of a traditional cheesecake without the stress of water baths or cracked tops. The combination of smooth cream cheese and rich dulce de leche creates a dessert that feels special enough for celebrations yet simple enough for weekend treats.
Have you tried making this no-bake dulce de leche cheesecake? Share your experience in the comments below! Did you try any of the variations or add your own creative twist? I’d love to hear how it turned out and see your creations. Don’t forget to tag us on social media with #DulceDeLecheDreams!
