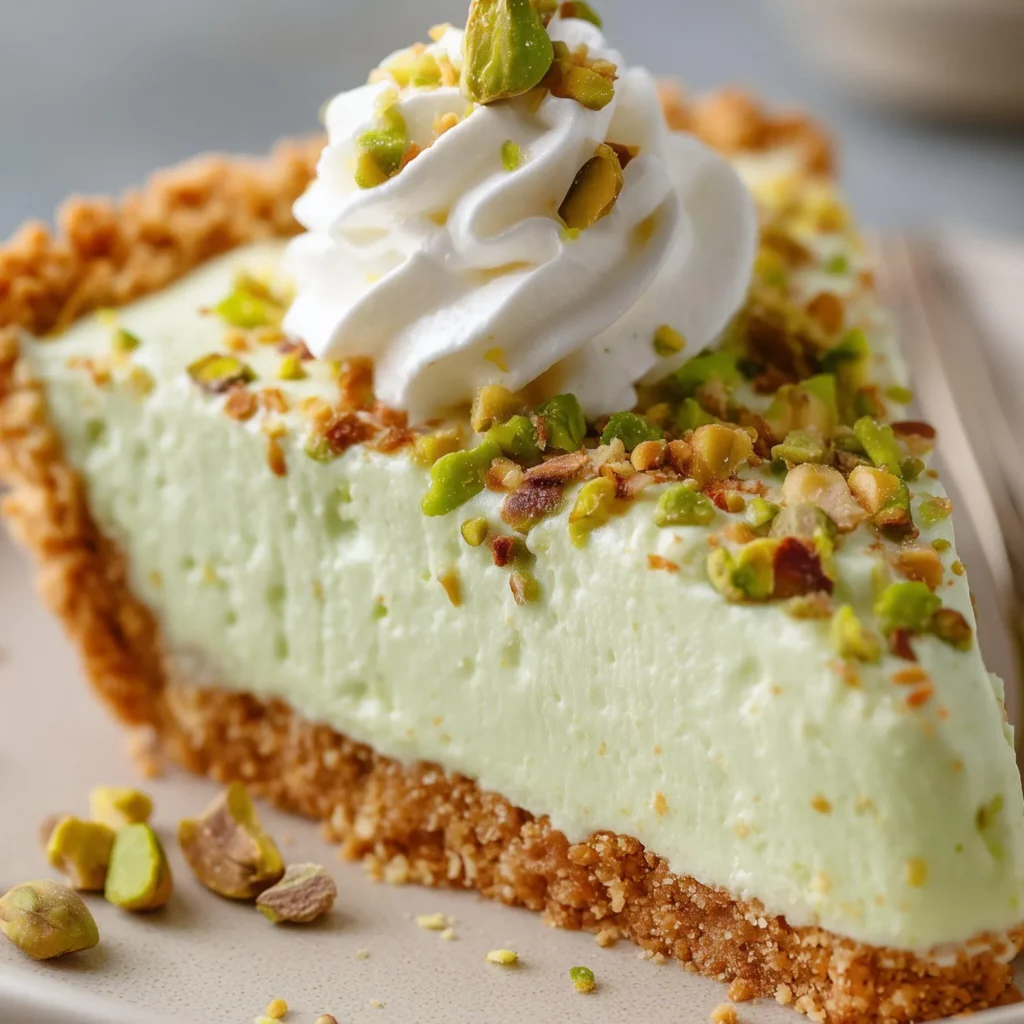
Have you ever craved a dessert that combines the refreshing taste of pistachios with the silky smoothness of pudding, all without turning on your oven? Summer heatwaves and busy schedules call for effortless treats that still impress, don’t they?
This No Bake Pistachio Pudding Pie is the answer to your dessert dilemmas. With its vibrant green hue and nutty flavor profile, this chilled masterpiece has become my family’s most requested treat for gatherings year-round. The best part? It comes together in minutes, then chills to perfection while you focus on other things.
Let me guide you through creating this simple yet stunning dessert that combines the nostalgic charm of instant pudding with the sophisticated flavor of pistachios. Whether you’re a seasoned baker or kitchen novice, this recipe promises foolproof results every time.
Ingredients List
Gather these simple ingredients for a dessert that tastes like you spent hours in the kitchen:
- 1 pre-made graham cracker crust (9-inch) – or substitute with a chocolate cookie crust for a delightful contrast
- 2 packages (3.4 oz each) instant pistachio pudding pie mix
- 2 cups cold milk (whole milk creates the richest texture, but 2% works well too)
- 1 container (8 oz) whipped topping, thawed and divided
- ½ cup chopped pistachios, plus 2 tablespoons for garnish
- ¼ teaspoon almond extract (optional, but enhances the nutty flavor beautifully)
- Green food coloring (optional, for a more vibrant color)
- Chocolate shavings for garnish (optional)
The beauty of this recipe lies in its adaptability. Lactose-intolerant? Substitute almond or coconut milk. Want a homemade touch? Create your own graham cracker crust with crushed graham crackers and melted butter.
Timing
- Preparation time: 15 minutes
- Chilling time: 4 hours (minimum) to overnight (preferred)
- Total time: 4 hours 15 minutes
This No Bake Pistachio Pudding Pie requires just 15 minutes of active preparation—30% less time than traditional baked pies that typically demand 45+ minutes of hands-on work. The remaining time is simply waiting for the refrigerator to work its magic, allowing you to prepare this dessert well in advance of any gathering.
Step-by-Step Instructions
Step 1: Prepare the Pudding Mixture
In a large mixing bowl, whisk together the 2 packages of instant pistachio pudding mix and 2 cups of cold milk. Whisk vigorously for 2 minutes until the mixture begins to thicken. The pudding will continue to set as it chills, so don’t worry if it seems slightly loose at this stage.
Step 2: Incorporate the Whipped Topping
Gently fold in 1½ cups of the whipped topping, reserving the remaining amount for decoration. Use a rubber spatula and fold with a light hand to maintain the airy texture. This creates that cloud-like consistency that makes this pie so irresistible.
Step 3: Add Flavor Enhancers
Fold in ½ cup of chopped pistachios and the almond extract (if using). If you desire a more vibrant green color, add 1-2 drops of green food coloring and gently stir until fully incorporated. The natural pudding has a lovely pastel green, but food coloring can create a more dramatic presentation.
Step 4: Fill the Crust
Pour the pudding mixture into your graham cracker crust, spreading evenly with a spatula. Smooth the top for a professional finish. Take care not to overfill; leave about ¼ inch from the top of the crust to prevent spillage.
Step 5: Chill
Cover the pie loosely with plastic wrap and refrigerate for at least 4 hours, preferably overnight. This chilling time is crucial for the flavors to meld and the texture to set perfectly. The longer it chills, the more pronounced the pistachio flavor becomes.
Step 6: Decorate and Serve
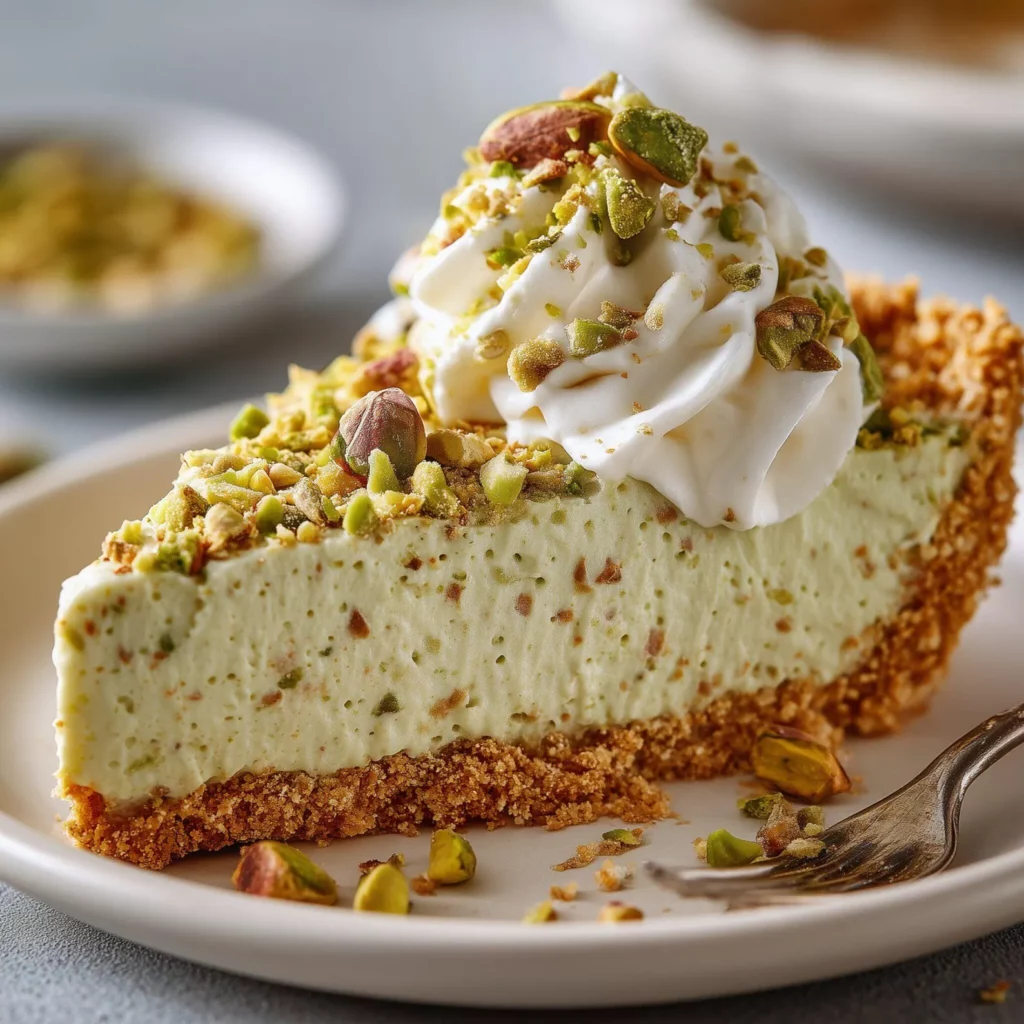
Before serving, spread or pipe the remaining whipped topping around the edges of the pie. Sprinkle with the reserved chopped pistachios and chocolate shavings if desired. This final touch elevates the presentation from homemade to gourmet.
Nutritional Information
Understanding what’s in your dessert helps make informed choices. Each slice (1/8 of pie) contains approximately:
- Calories: 285
- Fat: 14g (Saturated Fat: 7g)
- Cholesterol: 10mg
- Sodium: 350mg
- Carbohydrates: 34g
- Fiber: 1g
- Sugar: 22g
- Protein: 4g
This No Bake Pistachio Pudding Pie contains approximately 20% fewer calories than traditional cream pies, making it a relatively lighter option for those watching their caloric intake while still enjoying a satisfying dessert experience.
Healthier Alternatives for the Recipe
Looking to make this delightful treat align with specific dietary goals? Consider these modifications:
For reduced sugar: Use sugar-free pudding mix and lite whipped topping to cut calories and sugar content by nearly 30%.
For lower fat: Substitute skim milk for whole milk and use a reduced-fat graham cracker crust. This simple swap reduces the fat content while maintaining the creamy texture.
For a dairy-free version: Use almond milk and dairy-free whipped topping. Note that the pudding may not set quite as firmly, so consider adding ½ teaspoon of agar-agar powder to help with firming.
For a gluten-free option: Select a gluten-free graham cracker crust or make your own using gluten-free graham crackers or crushed gluten-free cookies.
Serving Suggestions
Elevate your No Bake Pistachio Pudding Pie with these creative serving ideas:
For a dinner party: Serve thin slices alongside espresso or Turkish coffee. The slight bitterness of the coffee beautifully complements the sweet, nutty pie.
For a family dessert: Create a dessert bar with the pie as the centerpiece, surrounded by additional toppings like chocolate sauce, caramel drizzle, and extra chopped nuts for customization.
For a summer gathering: Freeze the pie for 30 minutes before serving for an extra-refreshing treat. Pair with fresh berries on the side for a colorful plate.
For a holiday touch: During Christmas, add a few drops of red food coloring to half the reserved whipped topping and create a red and green swirl on top for a festive presentation.
Common Mistakes to Avoid
- Using warm milk: Always use cold milk straight from the refrigerator. Warm milk prevents the pudding from setting properly, resulting in a runny filling.
- Overmixing the whipped topping: Fold gently rather than stirring vigorously. Overmixing deflates the air bubbles that create the light, mousse-like texture.
- Skipping the chill time: Patience is key! The recommended 4-hour minimum chilling time is essential for proper setting and flavor development.
- Using salted pistachios without adjusting: If using salted pistachios, reduce any added salt in your crust to maintain flavor balance.
- Covering too tightly: When refrigerating, cover loosely to prevent condensation from dripping onto your perfect pie surface.
Storing Tips for the Recipe
Proper storage ensures your pie remains delicious for days:
Refrigeration: This pie will keep beautifully in the refrigerator for up to 4 days. Cover with plastic wrap after the first cutting to prevent the edges from drying out.
Freezing: Yes, you can freeze this pie! Wrap the completely chilled pie in plastic wrap, then aluminum foil, and freeze for up to 1 month. Thaw overnight in the refrigerator before serving.
Make-ahead strategy: Prepare the pie up to 2 days before your event. Add the final decorative whipped topping and garnishes just before serving for the freshest presentation.
Individual servings: For portion control or easy serving, prepare the recipe in individual graham cracker crusts or small ramekins with a graham cracker base.
Conclusion
This No-Bake Pistachio Pudding Pie delivers everything a perfect dessert should: stunning visual appeal, delightful texture contrasts, and a unique flavor that stands out from ordinary desserts. The combination of creamy pudding, crunchy nuts, and buttery crust creates a symphony of flavors that will have everyone asking for your secret recipe.
What makes this recipe truly special is its versatility—suitable for both casual family dinners and sophisticated gatherings. The minimal preparation time belies the impressive results, making this a go-to dessert for busy home cooks.
Have you tried making this refreshing pie? I’d love to hear about your experience or any creative variations you discovered! Share your results in the comments below, or tag us in your dessert photos on social media. And if you enjoyed this cool, creamy treat, don’t forget to explore our other no-bake desserts for year-round inspiration!


