Ever wondered if there’s a dessert that combines the irresistible crunch of Oreos with the sweet-tart burst of fresh raspberries—all without turning on your oven? Summer heat making you dread baking but still craving something spectacular for your next gathering?
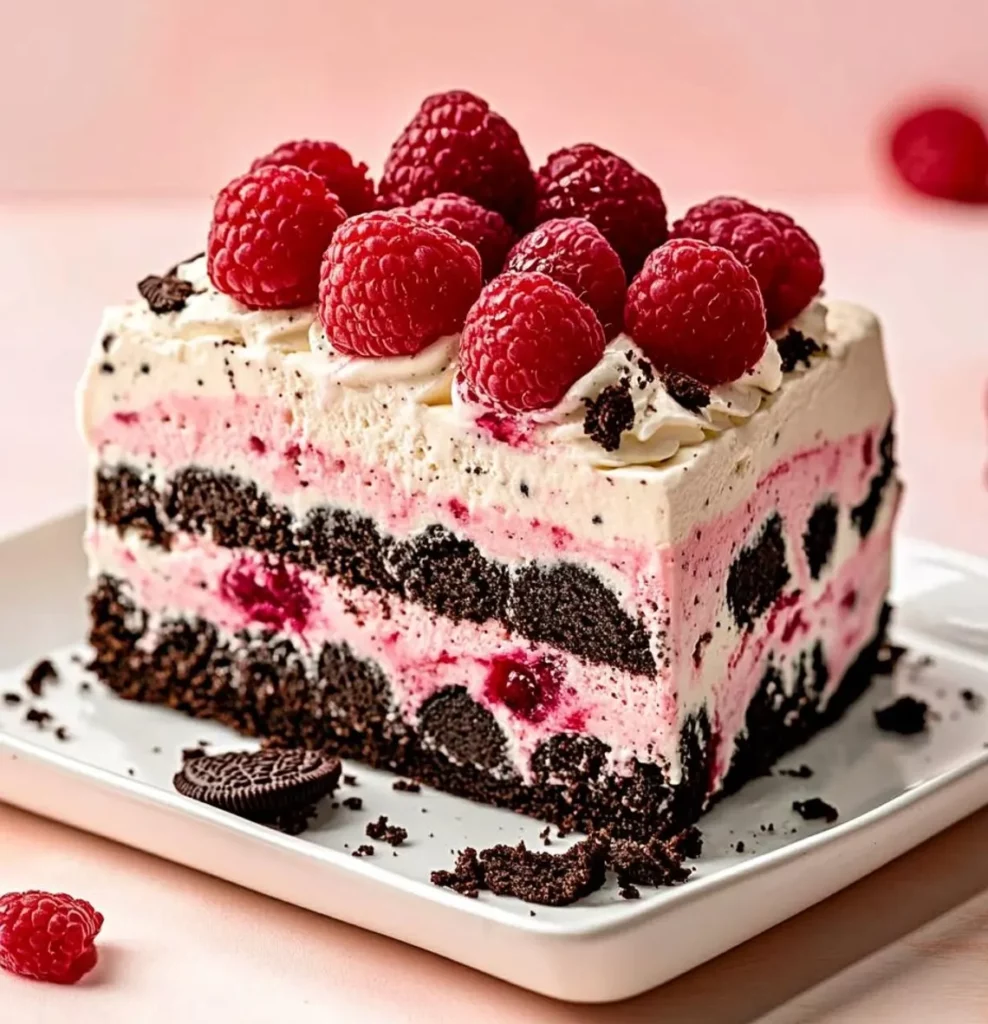
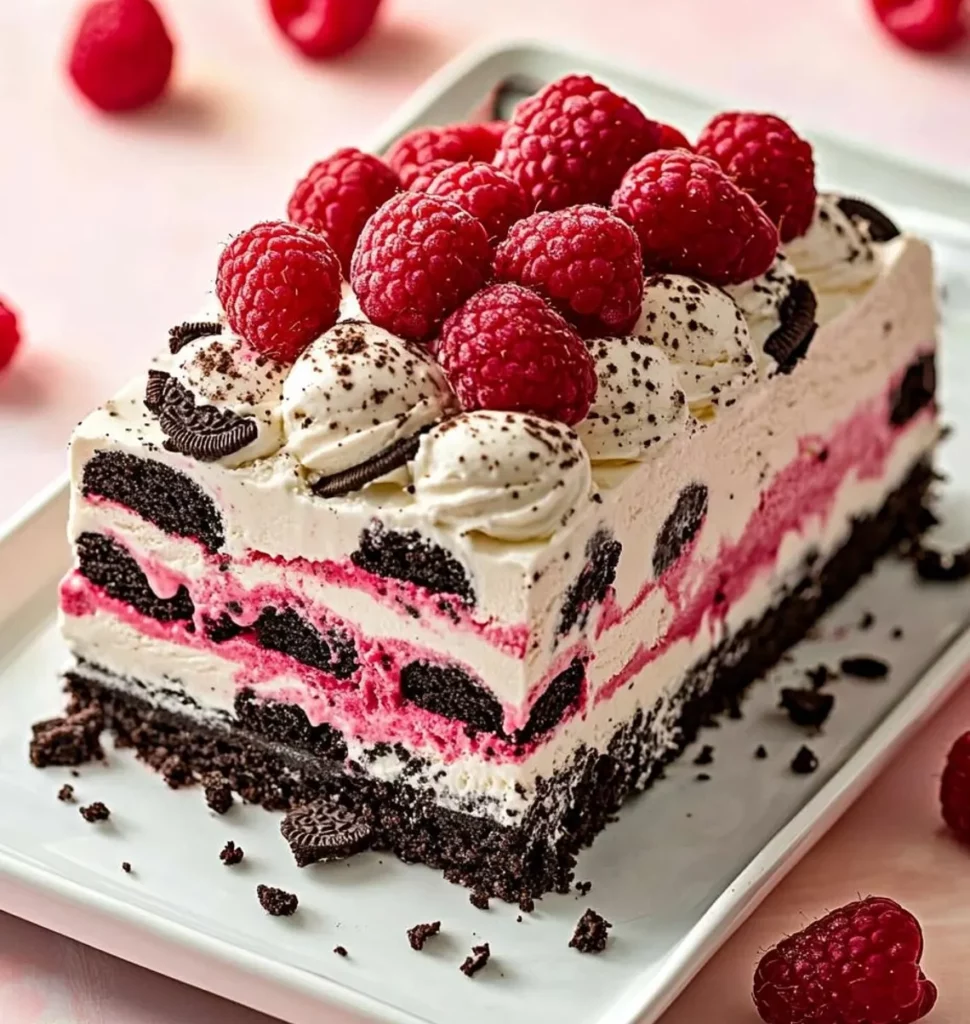
Let me introduce you to this No Bake Raspberry Oreo Icebox Cake that’s about to become your new favorite dessert hack. This luscious layered treat features creamy whipped filling, chocolate cookie crunch, and vibrant raspberry goodness—perfect for hot days when you can’t bear to heat up the kitchen.
The beauty of this raspberry oreo dessert is its simplicity paired with its impressive presentation. It looks like you spent hours in the kitchen, but our little secret? It takes just minutes of active preparation!
Ingredients List
- 36 Oreo cookies (about 3 sleeves) – You can substitute with chocolate graham crackers for a less sweet option
- 16 oz (2 packages) cream cheese, softened – For a lighter version, try Neufchâtel cheese
- 1 cup powdered sugar – Adjust to taste or use 2/3 cup for less sweetness
- 2 teaspoons vanilla extract – Pure is best, but imitation works too
- 3 cups heavy whipping cream – Can substitute with 8 oz of thawed whipped topping for convenience
- 4 cups fresh raspberries (about 2 pints) – Frozen work too, just thaw and drain excess liquid
- 2 tablespoons raspberry preserves – Optional, but enhances the raspberry flavor
- Dark chocolate shavings for garnish – Optional but adds elegant visual appeal
The combination of crisp cookies, tangy cream cheese, and juicy raspberries creates an irresistible texture and flavor contrast that makes this dessert truly special.
Timing
Preparation Time: 25 minutes
Chilling Time: 6 hours (minimum) to overnight (preferred)
Total Time: 6 hours 25 minutes (mostly hands-off)
This No Bake Raspberry Oreo Icebox Cake requires 70% less active time than traditional layer cakes, making it 100% more summer-friendly. The minimal prep work delivers maximum flavor impact—exactly what we want in a no-bake dessert!
Step-by-Step Instructions
Step 1: Prepare Your Pan
Line a 9×13-inch baking dish with parchment paper, leaving overhang on the sides for easy removal later. This step is crucial for clean slices and beautiful presentation. If you don’t have parchment, lightly coat the dish with cooking spray.
Step 2: Create the Cream Filling
In a large mixing bowl, beat the softened cream cheese until smooth and fluffy, about 2 minutes. Add powdered sugar and vanilla extract, then continue beating until well combined. Scrape down the sides of the bowl frequently to ensure everything mixes evenly.
Step 3: Whip the Cream
In a separate bowl, whip the heavy cream until stiff peaks form. This usually takes 3-4 minutes with an electric mixer. Be careful not to overwhip, which can make the cream grainy. The cream should hold its shape firmly when the beater is lifted.
Step 4: Combine the Mixtures
Gently fold the whipped cream into the cream cheese mixture using a rubber spatula. Use a down-and-over motion rather than stirring to maintain maximum fluffiness. The result should be a light, mousse-like consistency that will set beautifully when chilled.
Step 5: Prepare the Raspberries
Reserve about 1 cup of the prettiest raspberries for topping. In a small bowl, lightly mash 1 cup of raspberries with the raspberry preserves (if using). This creates a vibrant sauce that will add bursts of flavor throughout the cake.
Step 6: Begin Assembly
Arrange a single layer of Oreo cookies on the bottom of the prepared pan, breaking some cookies as needed to fill gaps. Don’t worry about perfection—the cream will hide any unevenness.
Step 7: Create the First Layer
Spread approximately 1/3 of the cream mixture over the cookie layer. Sprinkle with 1/2 cup of whole raspberries and drizzle with some of the raspberry-preserve mixture. The contrast between the white cream and ruby berries creates a stunning visual effect.
Step 8: Continue Layering
Repeat the process with another layer of Oreos, followed by cream, raspberries, and sauce. Continue until you’ve created 3 complete layers, finishing with the cream mixture on top. This layering technique ensures every bite contains the perfect balance of flavors.
Step 9: Add Final Touches
Arrange the reserved raspberries decoratively on top of the cake. If desired, add chocolate shavings or crushed Oreo crumbs for an elegant finishing touch. These garnishes hint at the delicious layers waiting beneath the surface.
Step 10: Chill Thoroughly
Cover loosely with plastic wrap and refrigerate for at least 6 hours, preferably overnight. This resting period is essential—it allows the cookies to soften and the flavors to meld into dessert perfection.
Nutritional Information
Each serving (1/12 of the cake) contains approximately:
• Calories: 420
• Total Fat: 32g (Saturated Fat: 18g)
• Cholesterol: 95mg
• Sodium: 230mg
• Total Carbohydrates: 32g (Dietary Fiber: 3g, Sugars: 22g)
• Protein: 5g
This No Bake Raspberry Oreo Icebox Cake delivers 15% of your daily calcium needs and contains antioxidants from the raspberries, making it a slightly more nutritious option than many conventional desserts. The raspberries provide 30% of your daily vitamin C per serving.
Healthier Alternatives for the Recipe
Looking to lighten up this indulgent treat? Consider these smart swaps:
• Substitute Neufchâtel cheese for regular cream cheese to reduce fat content by 33% with minimal flavor difference.
• Use reduced-fat Oreo Thins instead of regular Oreos to cut approximately 40 calories per serving.
• Replace half the powdered sugar with monk fruit sweetener or stevia for baking to reduce overall sugar content.
• Incorporate Greek yogurt in place of 1/3 of the cream cheese for added protein and a tangier flavor profile that complements the raspberries beautifully.
• For a gluten-free version, use gluten-free chocolate cookies instead of Oreos—many brands offer excellent alternatives that maintain the crucial chocolate flavor component.
Serving Suggestions
Elevate your dessert experience with these creative serving ideas:
• For an elegant dinner party, serve individual portions in clear glass trifle cups to showcase the beautiful layers.
• Create a dessert bar by offering small bowls of additional toppings like chocolate sauce, toasted sliced almonds, or additional berry varieties.
• For brunch gatherings, serve smaller portions alongside coffee with raspberry-infused whipped cream.
• During summer, add a scoop of vanilla ice cream on the side for an extra-special treat that balances the berry tartness.
• For a festive holiday touch, garnish with mint leaves and a light dusting of powdered sugar that resembles fresh snow.
Common Mistakes to Avoid
- Using cold cream cheese – Always bring it to room temperature for a smooth, lump-free mixture that blends perfectly with other ingredients.
- Overwhipping the cream – Stop when stiff peaks form; continuing further can turn your cream into butter, ruining the texture.
- Skimping on chilling time – The full 6+ hours is essential for the cookies to soften properly and flavors to meld.
- Using overly ripe raspberries – They’ll break down too much and make your cake soggy. Choose firm berries that hold their shape.
- Stirring rather than folding – This deflates the air in your whipped cream, resulting in a dense rather than light and airy texture.
- Cutting slices too soon – Let the cake sit at room temperature for 10-15 minutes before serving for cleaner, more defined slices.
Storing Tips for the Recipe
This dessert is ideal for make-ahead occasions! Here’s how to keep it perfect:
Store the assembled cake covered in the refrigerator for up to 3 days. The texture actually improves after the first 24 hours as the flavors continue to develop and meld together.
For longer storage, you can freeze individual portions for up to 1 month. Wrap each piece tightly in plastic wrap, then aluminum foil. Thaw overnight in the refrigerator for best results.
If preparing components ahead, the cream mixture can be made up to 24 hours in advance and stored separately. Just give it a quick whisk before assembling.
For best visual appeal, add the final raspberry garnish just before serving if you’re making this dessert more than a day in advance.
Conclusion
This dreamy No Bake Raspberry Oreo Icebox Cake proves that spectacular desserts don’t require complicated techniques or a hot oven. With its perfect balance of creamy, crunchy, and fruity elements, it’s destined to become your go-to recipe for everything from casual family dinners to special celebrations.
The minimal hands-on time delivers maximum flavor impact, making this an efficient yet impressive addition to your dessert repertoire. The make-ahead nature means you can focus on enjoying your guests rather than last-minute preparation.
Have you tried this recipe? I’d love to hear about your experience or any creative variations you’ve discovered! Drop a comment below or tag us in your dessert photos on social media. And if you loved this no-bake wonder, be sure to check out our other easy summer desserts that keep your kitchen cool and your taste buds happy!