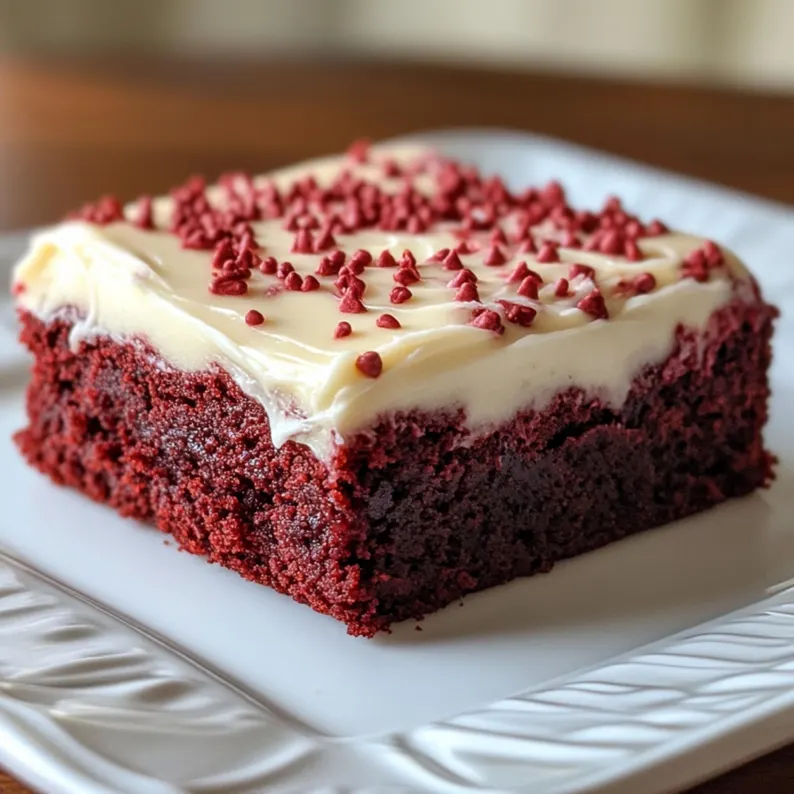
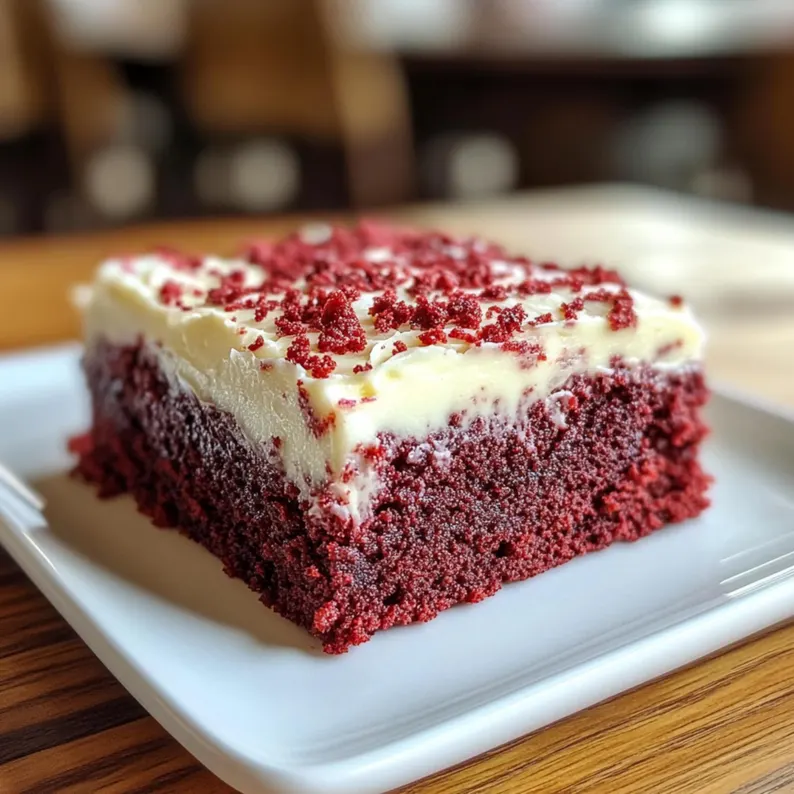
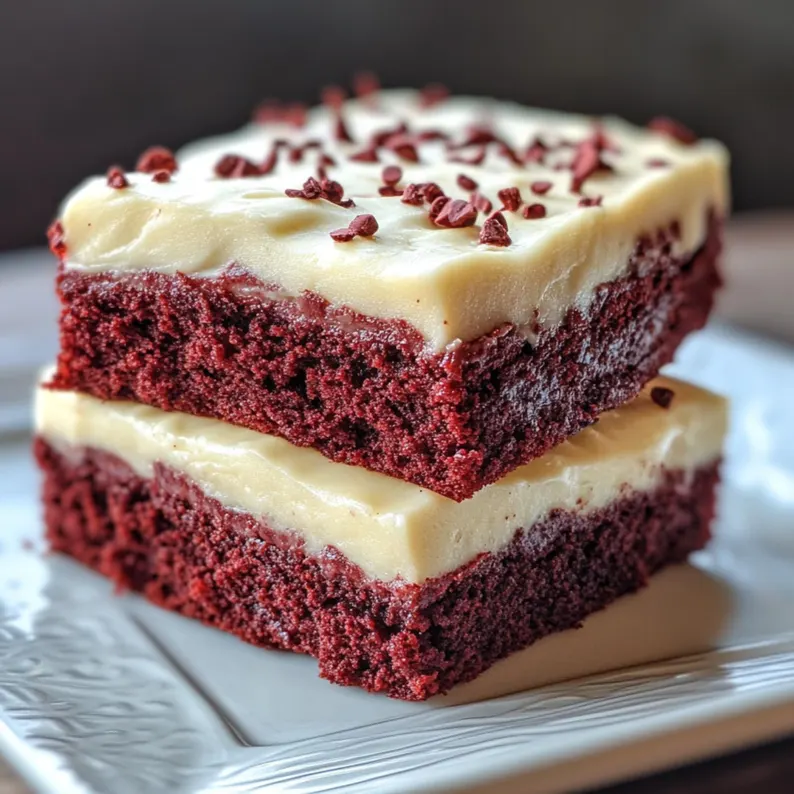
There’s something magical about biting into a rich, fudgy red velvet brownie topped with creamy, tangy cream cheese frosting. The bold crimson hue of the brownie meets the velvety white swirls of frosting in a dessert that’s as visually stunning as it is delicious. It’s a symphony of flavors and textures—chocolatey depth balanced by a hint of cocoa, a whisper of vanilla, and the cool, luxurious contrast of the frosting. This treat isn’t just food; it’s an experience steeped in Southern charm and modern indulgence.
I still remember the first time I made these brownies. My kitchen was filled with the intoxicating aroma of chocolate and butter, mingling with the sweet scent of cream cheese as I whipped up the frosting. As soon as they came out of the oven, their glossy tops calling my name, I knew I’d found a new favorite dessert. What struck me most was how effortlessly this recipe brought together contrasting elements to create harmony—a balance between indulgence and simplicity.
What makes red velvet brownies unique is their signature color and subtle cocoa flavor, enhanced by buttermilk for moistness. They’re incredibly versatile too! Add dark chocolate chips for extra richness or swap almond extract for vanilla to switch things up. Pair them with coffee, milk, or even a scoop of ice cream for pure bliss. So grab your mixing bowl and let’s dive into this irresistible creation—you won’t be able to stop at one bite!
Overview of the Recipe
Red velvet desserts have long been a symbol of Southern elegance, traditionally gracing tables during celebrations like weddings and holidays. Over the years, bakers have reimagined the classic cake into everything from cupcakes to pancakes. These red velvet brownies take the iconic flavor profile and transform it into a portable, gooey delight perfect for any occasion. With roots tracing back to the early 20th century, red velvet recipes originally gained popularity due to their striking color and mild cocoa taste. Today, they remain a timeless favorite, blending nostalgia with contemporary flair.
Recipe Details
- Prep Time: 15 mins
- Cook Time: 30 mins
- Total Time: 45 mins
- Servings: 12 brownies
- Dietary Tags: Vegetarian
- Difficulty Level: Easy
Why You’ll Love This Recipe
These red velvet brownies are more than just a dessert—they’re a crowd-pleaser. Whether you’re hosting a party, baking for loved ones, or simply treating yourself, they never fail to impress. Their vibrant red color makes them stand out on any dessert table, while the combination of tender, fudgy brownie layers and creamy frosting creates a taste sensation that’s hard to resist. Plus, they’re surprisingly easy to make, requiring no fancy techniques or equipment. Even beginner bakers can achieve bakery-worthy results!
Another reason to adore this recipe? Its adaptability. Want to dial up the chocolate factor? Stir in some semi-sweet chocolate chunks before baking. Prefer a lighter frosting? Opt for Greek yogurt cream cheese instead. The possibilities are endless, ensuring there’s a version of these brownies to suit every palate. And don’t forget the joy of sharing them—they’re sure to spark smiles and compliments wherever they go. Trust me, once you try these brownies, they’ll become a staple in your repertoire.
Ingredients List for Red Velvet Brownies with Cream Cheese Frosting
For the Brownies:
- 1 cup (226g) unsalted butter, melted
- 1 ½ cups (300g) granulated sugar
- 2 large eggs
- 1 teaspoon vanilla extract
- 1 tablespoon red food coloring (gel preferred for intense color)
- 1 ½ cups (190g) all-purpose flour
- ¼ cup (25g) unsweetened cocoa powder
- ½ teaspoon baking powder
- ¼ teaspoon salt
- ½ cup (120ml) buttermilk (or substitute with milk + 1 tsp vinegar)
- ½ cup (90g) dark chocolate chips (optional)
For the Cream Cheese Frosting:
- 8 oz (226g) cream cheese, softened
- ½ cup (115g) unsalted butter, softened
- 2 cups (240g) powdered sugar, sifted
- 1 teaspoon vanilla extract
- Pinch of salt
Step-by-Step Instructions for Making Red Velvet Brownies with Cream Cheese Frosting
- Preheat the Oven: Preheat your oven to 350°F (175°C). Grease an 8×8-inch baking pan or line it with parchment paper for easy removal.
Pro Tip: Use parchment paper with overhanging edges to lift the brownies out cleanly after cooling. - Make the Brownie Batter: In a large mixing bowl, whisk together the melted butter and sugar until smooth. Add the eggs one at a time, followed by the vanilla extract and red food coloring. Mix until the batter is vibrant and uniform.
Visual Cue: The batter should have a glossy, deep red appearance. - Combine Dry Ingredients: In a separate bowl, sift together the flour, cocoa powder, baking powder, and salt. Gradually fold the dry ingredients into the wet mixture, alternating with the buttermilk. Stir until just combined—do not overmix.
Pro Tip: Overmixing can make the brownies dense instead of fudgy. - Bake the Brownies: Pour the batter into the prepared pan and spread it evenly. If using chocolate chips, sprinkle them on top. Bake for 25–30 minutes or until a toothpick inserted in the center comes out with a few moist crumbs.
Visual Cue: The edges should be set and slightly pulling away from the pan, while the center remains soft. - Prepare the Frosting: While the brownies cool, beat the softened cream cheese and butter in a medium bowl until fluffy. Gradually add the powdered sugar, vanilla extract, and salt. Beat until smooth and creamy.
Pro Tip: Chill the frosting for 10–15 minutes if it feels too runny—it will firm up nicely. - Assemble and Decorate: Once the brownies are completely cool, spread the frosting evenly over the top. Use a spatula to create swirls for a decorative touch. Slice into squares and serve.
Serving Suggestions
Pair these decadent brownies with a hot cup of coffee or tea for an afternoon treat. For a more indulgent experience, serve them warm with a scoop of vanilla ice cream. Garnish with a dusting of cocoa powder or a drizzle of white chocolate for an elegant presentation.
Storage and Reheating Tips
- Storage: Store leftover brownies in an airtight container at room temperature for up to 3 days or in the refrigerator for up to 1 week.
- Freezing: Wrap individual brownies in plastic wrap and freeze for up to 3 months. Thaw at room temperature before serving.
- Reheating: For best results, microwave briefly (10–15 seconds) to soften the frosting. Avoid reheating in the oven, as it may dry out the brownies.
Variations and Substitutions
- Alternative Ingredients: Swap buttermilk with almond milk + 1 tsp lemon juice for a dairy-free option. Use gluten-free flour for a gluten-free version.
- Dietary Adjustments: Replace regular sugar with coconut sugar for a lower glycemic index. Use vegan butter and cream cheese for a plant-based twist.
- Flavor Boosts: Add ½ teaspoon almond extract to the frosting for a nutty undertone or fold crushed pecans into the batter for added crunch.
Nutritional Info
Per Serving (1 brownie):
- Calories: 320
- Protein: 4g
- Carbs: 45g
- Fat: 16g
Nutritional values are estimates and may vary based on specific ingredients used.
Conclusion
These Red Velvet Brownies with Cream Cheese Frosting are the ultimate dessert for any occasion—or no occasion at all! Their rich flavor, eye-catching color, and creamy topping make them irresistible. Don’t wait—grab your ingredients and bake a batch today. Share your creations with us by rating the recipe or posting photos online with #RedVelvetBrownieLove!
FAQs
Q1: Can I use liquid food coloring instead of gel?
A: Yes, but you may need to use more to achieve the same vibrant red color. Gel food coloring is more concentrated and less likely to alter the batter’s consistency.
Q2: Can I skip the frosting?
A: Absolutely! These brownies are delicious on their own, though the frosting adds a delightful contrast.
Q3: My brownies turned out cakey. What went wrong?
A: Overmixing the batter or adding too much flour can lead to cakey brownies. Measure ingredients carefully and mix until just combined.
Q4: How do I know when the brownies are done?
A: Insert a toothpick into the center. It should come out with a few moist crumbs, not wet batter. The edges will also pull slightly away from the pan.
Q5: Can I double the recipe?
A: Yes! Simply double all ingredients and use a 9×13-inch pan. Adjust baking time by 5–10 minutes if needed.
Q6: Why does my frosting taste grainy?
A: This usually happens if the powdered sugar isn’t fully incorporated. Sift the sugar beforehand and beat the frosting thoroughly for a smooth texture.