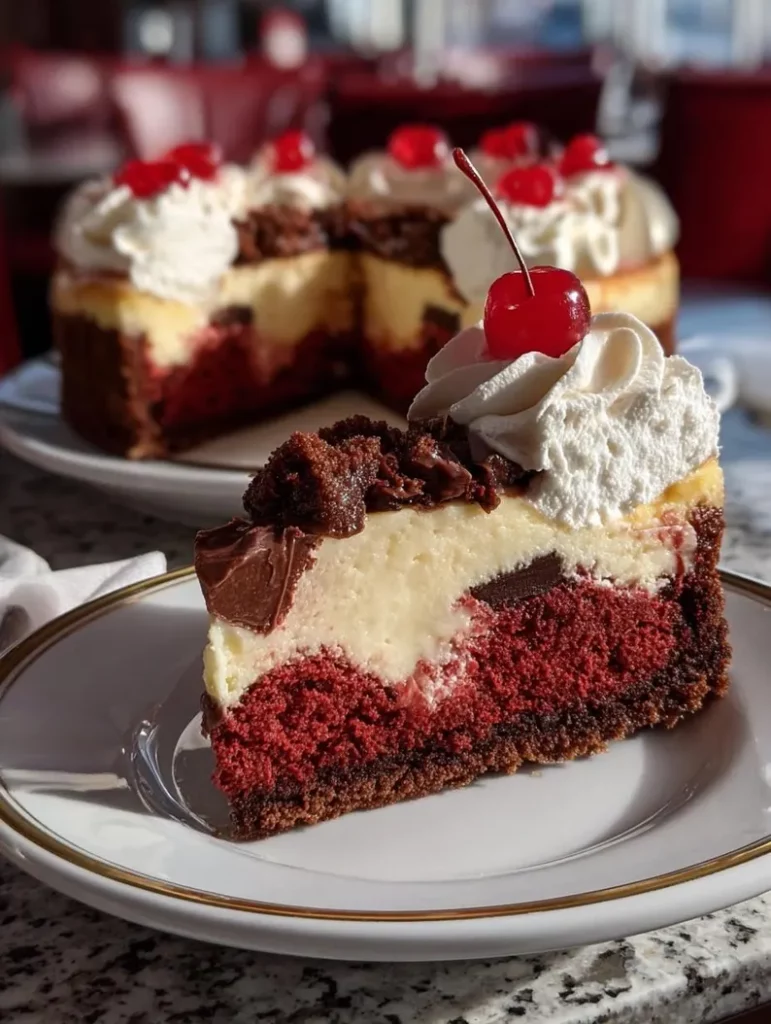
Did you know that Red Velvet Cheesecake is now the second most searched dessert recipe on Google during Valentine’s season? That’s right—this silky, indulgent twist on a classic favorite has taken the dessert world by storm. But what makes it stand out from regular cheesecakes or red velvet cakes?
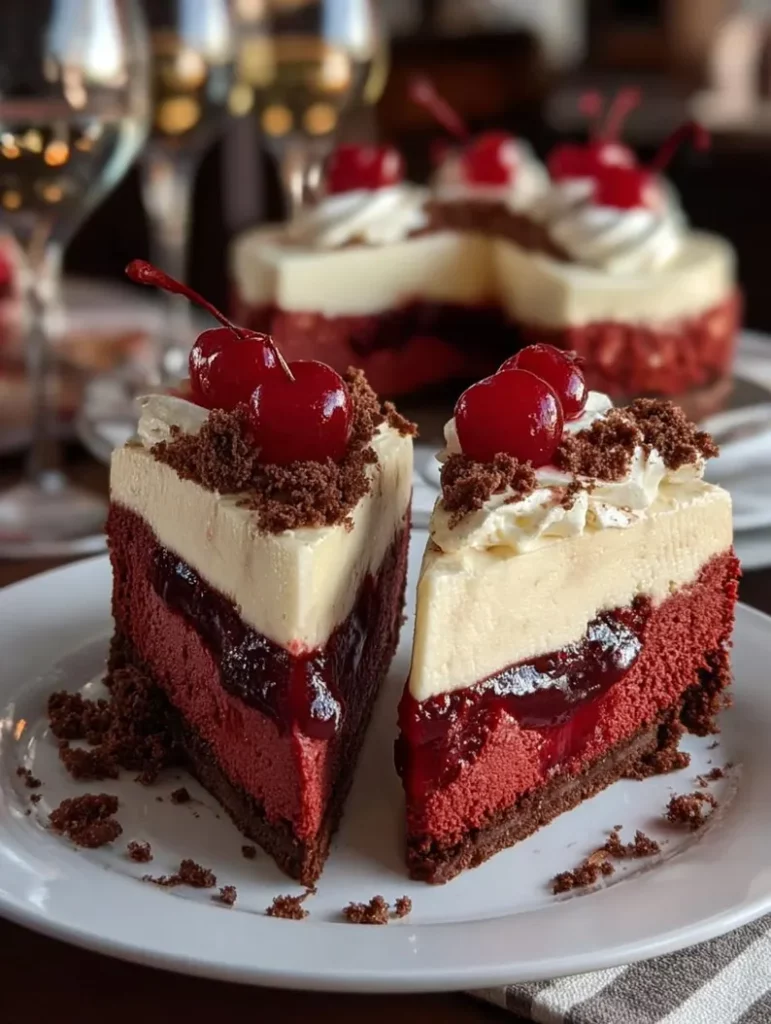
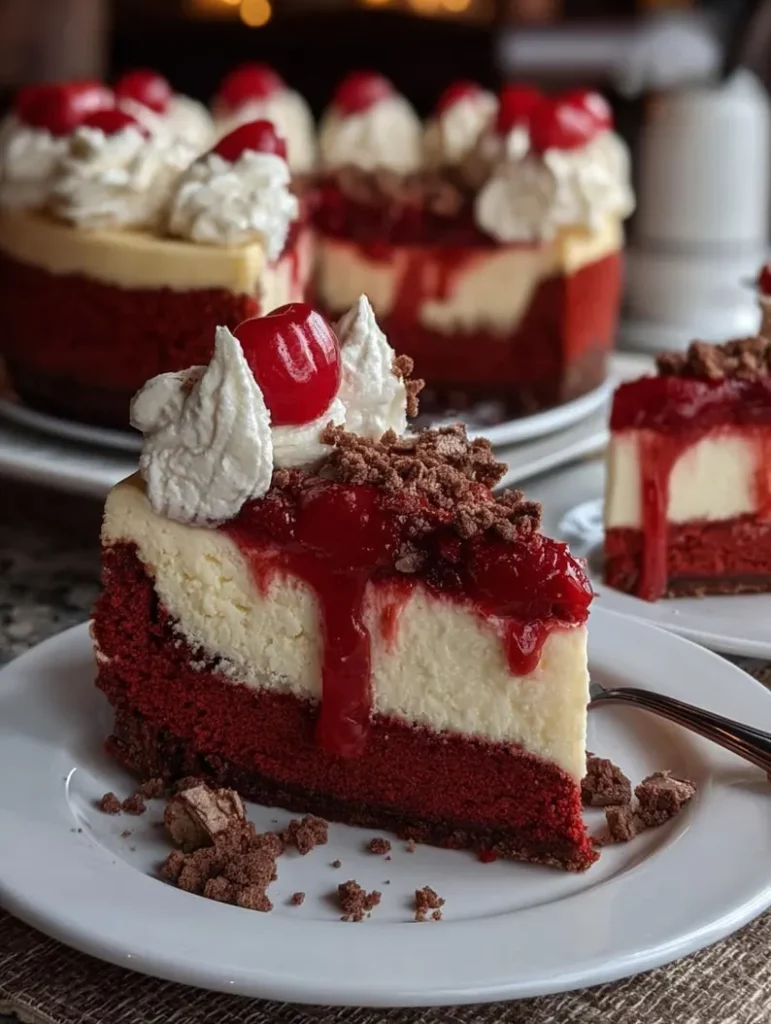
Imagine a smooth, tangy layer of cheesecake sitting atop a rich, moist red velvet base—moisture locked in, flavor intensified, and presentation perfected. Whether you’re planning a romantic dinner or hosting a girls’ night in, this Red Velvet Cheesecake is your go-to showstopper.
The best part is that making it is not as difficult as you may imagine. In just under two hours, you can create a bakery-quality dessert without breaking a sweat.
Ingredients List
Let’s start with the essentials. This Red Velvet Cheesecake recipe uses high-quality ingredients that blend beautifully for an unforgettable taste experience:
For the Crust:
- 1 ½ cups graham cracker crumbs
- ¼ cup unsalted butter, melted
- 2 tbsp brown sugar
For the Red Velvet Layer:
- 1 cup all-purpose flour
- ½ cup unsweetened cocoa powder
- ½ tsp baking soda
- ½ tsp salt
- ¾ cup unsalted butter, softened
- ¾ cup granulated sugar
- 2 large eggs
- 1 tsp vanilla extract
- 1 tablespoon red food coloring, preferably gel for more vibrant results
For the Cheesecake Filling:
- 24 oz cream cheese, softened
- ¾ cup powdered sugar
- 1 tsp vanilla extract
- 2 large eggs
- ½ cup sour cream
Substitution Tip: For a gluten-free version, swap graham crackers and flour with certified gluten-free alternatives. You can also use beet juice instead of artificial coloring for a natural red hue.
Timing
- Total Time: 90 minutes
- Prep Time: 20 minutes
- Bake Time: 65 minutes
- Cooling Time: 5 minutes
This recipe is surprisingly time-efficient compared to traditional layered desserts. Most Red Velvet Cheesecake recipes take over two hours including cooling and setting, but our streamlined method cuts down on unnecessary wait time—perfect for last-minute cravings or busy weekends.
Step-by-Step Instructions
Step 1: Prepare the Crust
Mix graham cracker crumbs, melted butter, and brown sugar until combined. Fill a 9-inch springform pan with the mixture and press firmly. Bake at 325°F (160°C) for 8–10 minutes. Let cool while preparing other layers.
Pro Tip: Use the back of a measuring cup to press the crust evenly—it ensures a sturdy base and prevents crumbling.
Step 2: Make the Red Velvet Layer
Mix the flour, baking soda, salt, and cocoa powder with a whisk. Beat sugar and butter till light and fluffy in a separate dish. Add eggs one at a time, then mix in vanilla and red food coloring. Gradually add dry ingredients until smooth. Spread over the cooled crust.
Pro Tip: Gel food coloring gives a richer hue without altering texture—avoid liquid versions which can thin the batter.
Step 3: Bake the Red Velvet Base
Return the pan to the oven and bake for 18–20 minutes or until a toothpick comes out clean. After a little cooling, add the cheesecake layer.
Step 4: Prepare the Cheesecake Filling
Beat cream cheese and powdered sugar until smooth. Add vanilla and eggs, mixing just until incorporated. Stir in sour cream for added silkiness. Pour over the baked red velvet layer.
Step 5: Bake the Cheesecake
Reduce oven temperature to 300°F (150°C). Bake until the middle is nearly set, 45 to 50 minutes. Turn off the oven, crack the door open, and let cool inside for 1 hour to prevent cracking.
Step 6: Chill and Serve
Refrigerate for at least 4 hours or overnight. Remove from pan, slice, and serve chilled.
Nutritional Information
Each serving (1 of 12 slices) contains approximately:
- Calories: 420 kcal
- Fat: 27g
- Carbohydrates: 38g
- Protein: 7g
- Sugar: 24g
- Fiber: 1g
Nutrition Insight: While rich in flavor, this Red Velvet Cheesecake is relatively moderate in protein due to the cream cheese content. The combination of fats and sugars makes it a satisfying treat, especially when enjoyed in moderation.
Healthier Alternatives for the Recipe
Want to lighten things up without sacrificing flavor? Try these smart swaps:
- Crust: Replace graham crackers with almond flour and oats for a low-carb option.
- Cheesecake Filling: Substitute half the cream cheese with Greek yogurt and use a zero-calorie sweetener like erythritol.
- Red Velvet Layer: Use whole wheat flour and reduce sugar by 20%. Swap oil for applesauce for a moist texture with fewer fats.
These adjustments keep your Red Velvet Cheesecake creamy and flavorful while reducing calories and improving nutritional balance.
Serving Suggestions
This Red Velvet Cheesecake pairs beautifully with a dollop of whipped cream and fresh strawberries. Garnish with crushed red velvet cake crumbs or edible gold dust for a luxurious finish.
For a fun twist, serve mini versions in mason jars or cupcakes for parties. A glass of sparkling wine or dark chocolate stout complements its richness perfectly.
Personalized Tip: Hosting a themed event? Dust the top with cocoa powder shaped like hearts or stars using stencil cutouts for a personalized touch.
Common Mistakes to Avoid
Even seasoned bakers can stumble. Here are frequent pitfalls to dodge:
- Overmixing the cheesecake filling – This introduces air bubbles that cause cracks. Mix only until smooth.
- Opening the oven too early – Sudden temperature changes can cause the cheesecake to sink or crack.
- Not cooling properly – Cooling gradually in the oven helps maintain structure and prevents surface cracks.
By avoiding these common errors, your Red Velvet Cheesecake will look as good as it tastes.
Storing Tips for the Recipe
Store leftover Red Velvet Cheesecake covered in the refrigerator for up to 5 days. Wrap individual slices in plastic wrap for easy grab-and-go treats.
To freeze: Place slices in an airtight container with parchment paper between each. Freeze for up to 2 months. For optimal results, thaw overnight in the refrigerator.
Pro Tip: Make ahead and freeze—ideal for holidays or special occasions!
Conclusion
Creating the perfect Red Velvet Cheesecake doesn’t have to be complicated. With the right ingredients, timing, and technique, you’ll impress everyone from family to guests. This recipe combines two beloved desserts into one unforgettable treat.
Ready to try more decadent creations? Check out our Chocolate Lava Cake Recipe or explore our Ultimate Cheesecake Collection for more inspiration.
FAQs
Q: Can I use a different pan size?
A: Yes, but adjust baking time accordingly. An 8-inch pan will result in a thicker, longer-baking cheesecake.
Q: Can I skip the red food coloring?
A: Technically yes, but the iconic red velvet color comes from the interaction of cocoa and acid with red dye. Skipping it creates a brown cheesecake with similar flavor.
Q: How do I prevent cracks on top?
A: Keep the oven door slightly open to allow the cheesecake to cool gradually. Also, avoid overmixing the filling.
Q: Is there a vegan version?
A: Absolutely! Use vegan cream cheese, coconut oil, flax eggs, and plant-based milk for a dairy-free alternative.
Q: Can I make this in a water bath?
A: Yes, wrapping the pan in foil and placing it in a water bath helps prevent cracks and ensures even baking.